- Home
- Education
- Drawing Painting Pastels
- Live Studio Watercolour III

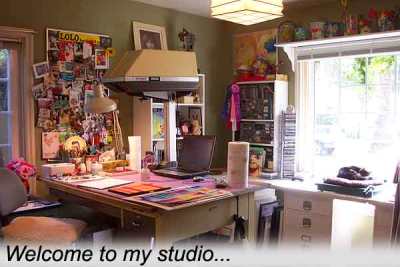
Welcome to my studio!
Thank you for joining me tonight for my LIVE watercolor demonstration! Thanks also to Melissa and EBSQ for providing this convenient venue for artists to share with one another.
Just a bit of background about how I got hooked on painting watercolors.
I took my first watercolor class in college (many years ago.) To this day, I can remember watching my instructor do a simple yellow transition on a piece of watercolor paper... my jaw dropped and I knew at that instant, that watercolor was for me.
- I loved how the paint looked when it was applied to the paper.
- I loved how it flowed from color to color like magic.
- I loved that it was immediate.
- I loved that it challenged me.
- I loved that I was at it's mercy...but determined to master it.
So tonight I will be showing you how "I" paint a watercolor. I love color, pattern, and whimsical imagery as you will see.
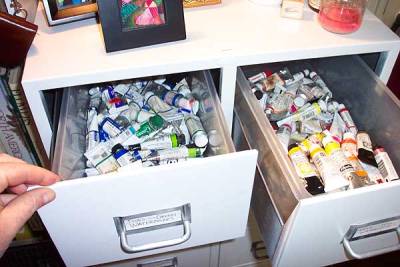
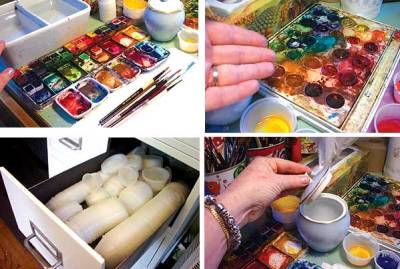
Here are my paints & mixing palettes. I use a variety of brands and like cake and tube paints equally. I keep my paint tubes separated (warm in one drawer...cools in the other) I would talk more about paints and such, but I kind of did that in my first watercolor demo for EBSQ in Nov. of 2002. You can refer to that demo for more technical stuff.
I use a lot of little mixing trays, but my favorite thing recently are these cheap little plastic (soufflé) cups that you can buy at wholesale restaurant supply stores. In that light blue sugar container, I have put a few drops of "water tension breaker" it's covered so my cats won't drink it.
What is Water tension breaker you ask? Well, it keeps the paint (wetter?) so you can blend it a little longer. It's great for warmer climates, or painting watercolors outdoors. (Just don't add too much, otherwise your edges will keep creeping across your paper)
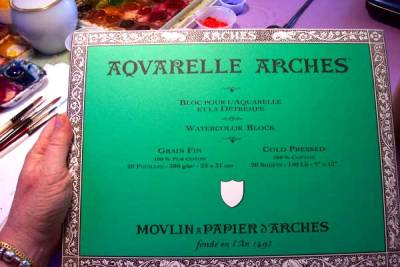
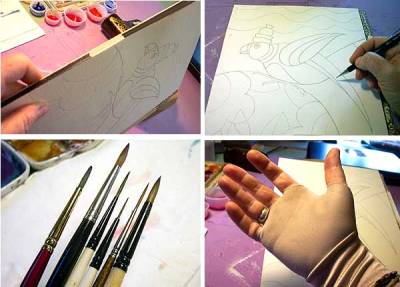
Tonight I will be using a 9" x 12" Arches 140lb. Cold Press watercolor block. I love watercolor blocks, even though they are expensive. I used to stretch all my own watercolor paper, but now I just use blocks or 300lb. paper that requires no stretching because its thick enough not to Cockle on you. lol! I had never heard of "Cockling" until I was looking up art terms on the internet. Cockling is: "A wrinkling or puckering of paper supports caused by applying washes onto a flimsy or improperly stretched surface." See? Now you know. Feel free to use that at your next party.
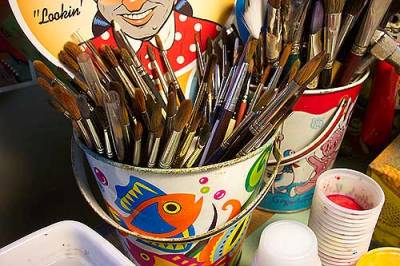
A watercolor block is bound on all four sides, and prevents curling of the sheet while eliminating the need for stretching the paper the traditional way. I don't use blocks any larger than 12" x 16." The larger the block the more they (split) and that really bites since a 18" x 24" watercolor block can run you $60 or more. I will be using a variety of natural sable brushes as well as a few synthetics.
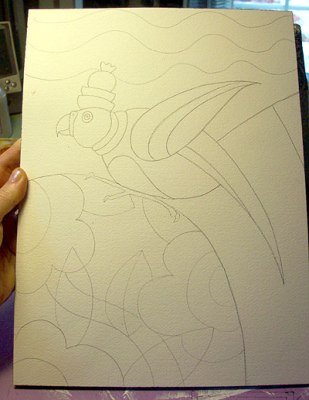
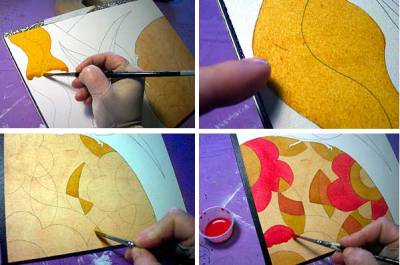
I wear that ((attractive)) glove on my hand to keep from getting the surface of my paper dirty as well as keep the natural oils from my hand from transferring on to the paper. Tonight I will be painting a "Stylized Parrot."
I have decided that I want the center of interest (the parrot) to be in cool colors like greens and blues.... and the area around him I will use warmer ANALOGOUS colors --like yellow, orange and red. (Analogous means colors that sit next to each other on the color wheel. They tend to look good together because they are closely related.)
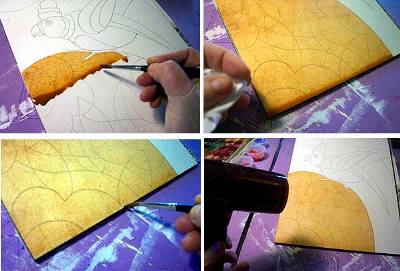
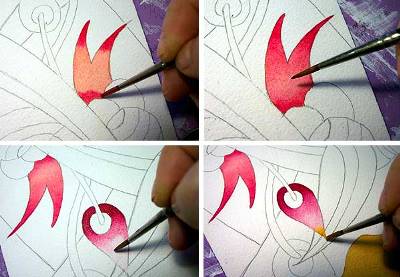
First I mix up some golden brown paint to do a simple WASH. (A wash is a thin, usually broadly applied layer of transparent or heavily diluted paint) It's important to mix up a lot of paint (depending on the area you are painting of course) because running out of paint in the middle of your wash is very frustrating.
You also need to position your watercolor block at a 45 degree angle which helps you keep a continuous bead of paint building up as you drag the paint down the sheet with your brush.
At the end of the wash you soak up the bead of paint by using the tip of your paint brush, blotting the brush on a tissue or your sponge until you soak it all up. (DON'T go back up into the "body" of the wash with your brush)
Next I mixed up a deep golden yellow and painted another area (away from my first wash.) Oh! and see where I'm pointing? That's a little kitty hair that got it the paint. And notice I left it there? Yes, you can't go back...But don't panic, you won't see it when it dries.
As the golden yellow wash is drying, I start to paint some of the smaller simple shapes on top my first wash, (which I have made sure is very dry.) This is called GLAZING. (Glazing is a very thin, transparent colored paint applied over a previously painted surface to alter the appearance and color of the surface.)
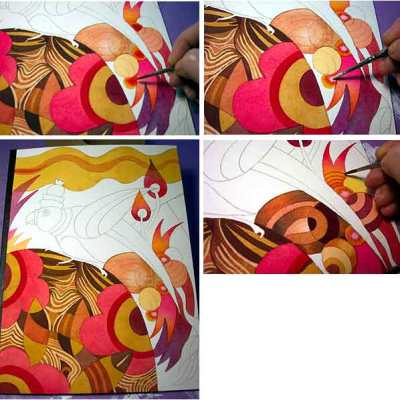
Here's a little more progress showing that the colors I'm using are getting more INTENSE but are still staying analogous. (Intensity is the purity & brightness of a color also called saturation) I often look through vintage textile design books to get pattern ideas.
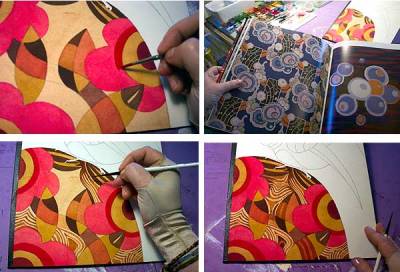
Now I take a look at my painting and feel that my composition needs something to balance it more on the right hand side.
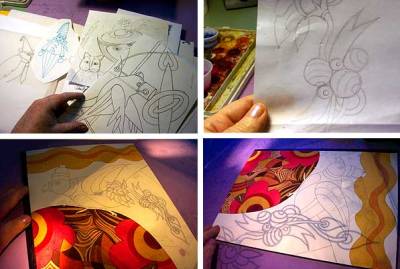
I go through my tracings and sketches and find a deco floral design that I'm hoping might work. I pop it into my opaque projector and play around with sizes and which direction I think it should go.
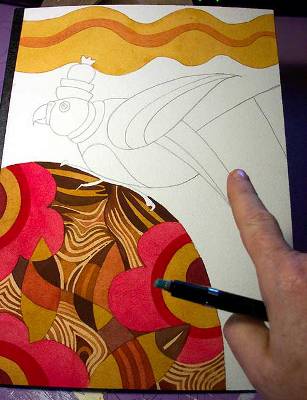
Now that I'm happy my composition again, I start to paint a few small TRANSITIONS. (Transitions are smoothing the edges of two colors together so they have a smooth gradation where they meet.)
One way I paint a transition is to put a pale wash all over the shape first, then while its still wet I take some stronger pigment and add it to the edges/corners. I blot my brush a little first, then lightly tickle the edges of the darker pigment into the lighter wash until I'm happy with the look. It's just a "touch" you will develop over time. You have to work quick and it does take practice!
K, now I paint a little more on the side deco floral shapes.
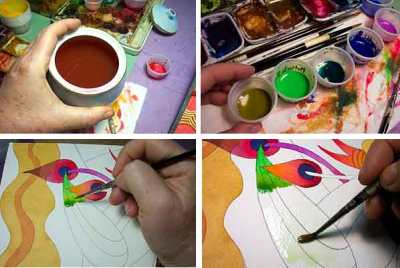
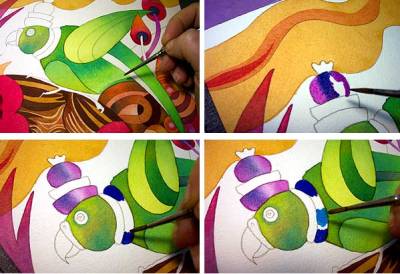
Finally I'm ready to start on the parrot. Since he's going to be in greens, I need to get some clean water.
I mix up a variety of different green pigments and a blue and purple to use a little later. I started with his wing. Why don't you just look at the next couple pictures and I'll stop blabbing for a minute...
Picture One

Picture Two
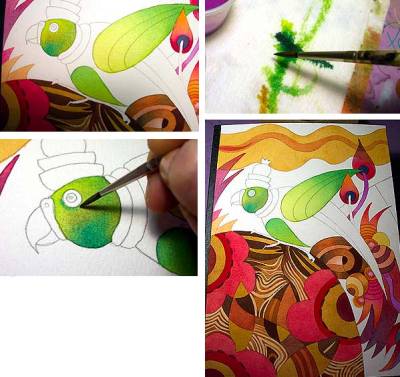
Picture Three
The blue rings are added around his neck...and I start on his funny little hat.
Next I paint his eye and beak.
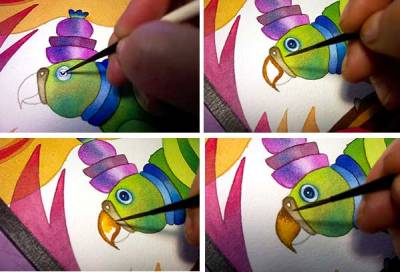
Here are few pictures of me adding a couple (buffer edges) as I like to call them. They are really just transparent washes of colors (glazes again) that I add to give certain areas depth, soften a hard edge or just to add some visual interest.
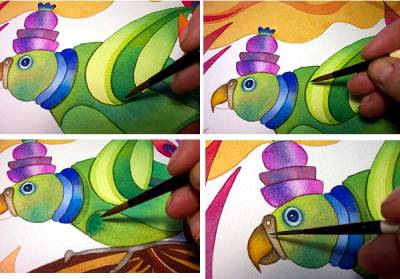
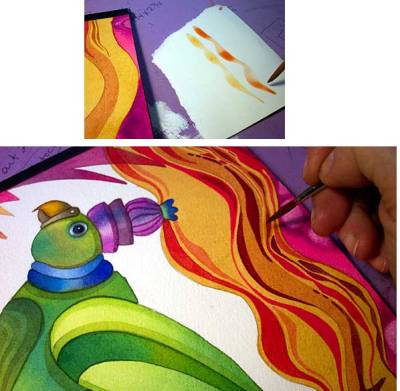
Now I will be working on the top portion of the painting.
I've decided to do a wavy pattern with glazes over the top of the pale orange wash. So I practice first on a separate sheet of paper to find the brush that feels right.
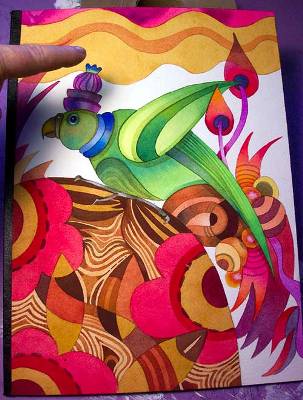
I'm pretty much done with the watercolor part of my painting, but I still have a few areas, mainly the background, that I will be painting with black matte acrylic paint.
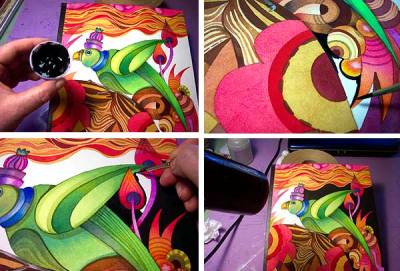
Next I add a few gel pen designs for more detail.
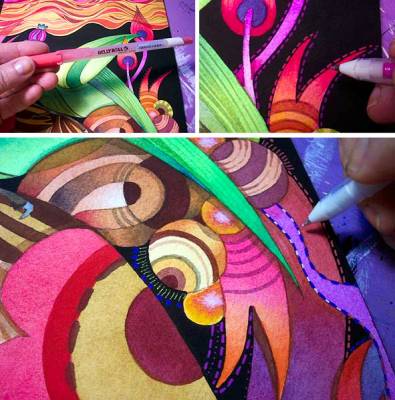
I'm pretty happy with how its looking...so I decide I'd better stop. That's the hardest part for me, knowing when to stop! So here's my finished painting.


