- Home
- Education
- Drawing Painting Pastels
- Acrylic Techniques
Alien Anatomy- A Walkthrough an Alien Landscape in Acrylics
Harmony Steel
Drawing, Painting, Pastels
I've put together a walkthrough of my 'Alien Landscape' acrylic painting for anyone who's curious to see how I paint. I'm largely self-taught when it comes to painting in acrylics so if you know a better way of doing something here pleeeease tell me :)
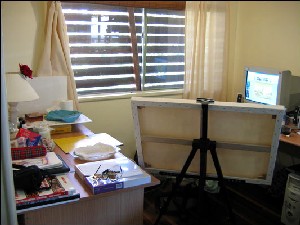
First a quick look at my workspace... it's a little crowded I know but it does the trick. I always try and work with my canvas facing natural light, and I have the overhead light switched on too to get a realistic idea of how my painting will look when it's hung on a wall.
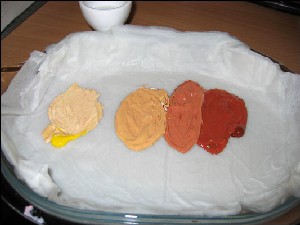
Here's most of the materials I use - a water container for my brushes, a rag to wipe the brushes, white gesso to prime the canvas, my home-made palette, and some wonderful disposable palette's which are real time-savers, especially for a messy painter like me.
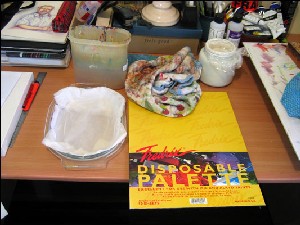
I've tried a few different palette's and this one works the best by far. I'm just using the lid from a glass casserole dish and I've folded six sheets of paper-towel (Handi ultra-absorbent works well), run them under water (squeeze out any excess) and squished them into the contours of the dish. Then I get one of my disposable palette's (cut in half) and press that onto the paper towel. The wet paper towel keeps the palette cool so that your paints don't try out too quickly, and the best bit is that when you're finished you can just chuck it all in the bin which is much easier than scrubbing off paint. I also use an egg cup to keep my painting medium (right) seperate from my paints.

This is the brush I used for most of the painting. It's my favourite brush, a Windsor & Newton size 18 bright Galeria.

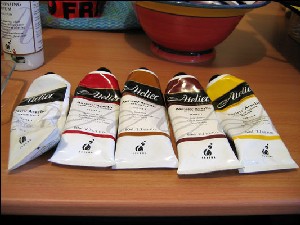
Onto the paints. I use Atelier acrylics which are professional artists acrylics produced in Australia. They have a beautiful thick oil-like consistency, and produce fantastic vibrant colors. If you come from an oil-painting background like me then you'll probably like these paints. They cost around $15 - $20 a tube.
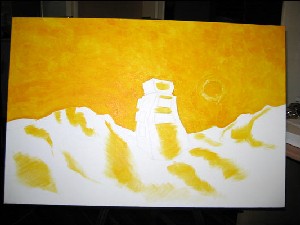
Now to the canvas. I'm using a 20"x30" gallery-wrapped canvas (no staples on the side) and it's already been primed, however for good measure I slap another two coats of gesso onto it as I'd rather the canvas suck up the cheap gesso than my acrylics. I sketch a light outline directly onto the canvas using a 4B pencil...

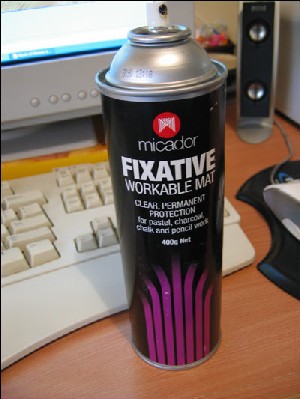
...and then seal it all with a coat of fixative. You will still find you get a little bit of smudging if you're painting over pencil, but the fixative will minimise that.
Finally, after all the prep time, I get to paint :)! I've mixed up my base color with a bit of acrylic medium to make the paint go further - the important thing to do at this stage is to make sure all the white canvas fibres are covered by the paint, the actual base coat doesn't have to be really thick as you're going to paint over the top of it anyway. Using this method I paint the sky, and the highlights on the building and hills.
Before adding more colors I wave a hair dryer over the base coat for a few minutes until it's touch-dry. I do this because if acrylics are half-dry and you start to paint over them again you'll get all sorts of sticking and flaking problems. Sometimes I need to hair-dry, and other times I know when the acrylics are still wet enough to work with, I suppose it just comes with getting used to your particular brand of paints.
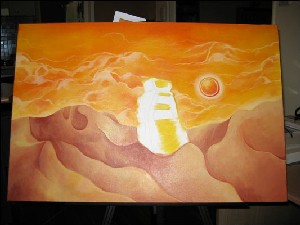
I build up the base colors by adding more yellow, red and orange and smearing them together with a sponge brush. Then I start adding clouds using my normal brush and a lighter shade of lemon yellow.
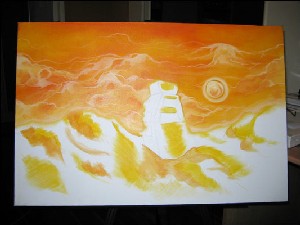
I add vermillion shadows to the clouds and finish painting the sun.

Here's a close-up of the clouds.

My next step is to create the base for the desert.
Like the sky I add highlights and shadows and merge them together using the sponge brush. Also, as with the sky, I'm using a bit of medium with my paint so that it doesn't dry too quickly, and I work fast with the sponge brush to make the colors blend into each other. When that's done I take a little brush and mark out where the highlights will appear.
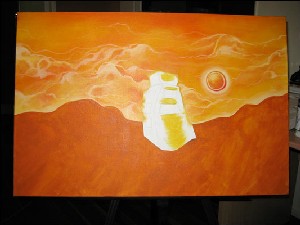
Since acrylics tend to dry quickly I mix up the colors I'll be using for the desert before I start painting it. I paint the desert hills by starting with the lightest color, cleaning my brush off on a rag, and then moving to the next lightest color, etc.
By working fast you can get a nice gradient effect.

The desert still looks a bit flat and unrefined so I continue to add highlights and shadows until I'm happy with it.
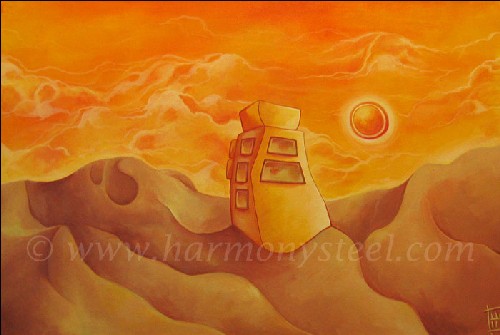
It's finally time to start on the building. As the feature point of the painting I have to make it look good! I begin by just laying down my base colors (the building is reflecting the sun and sky so the colors match), and adding a few shadows and highlights on one side.
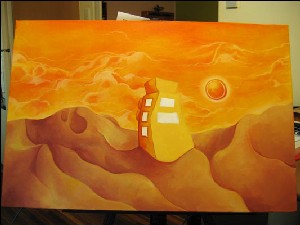
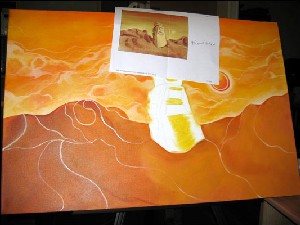
I do the same on the lighter side and paint in the windows. I want them to look like little jewels so I add a bit of grey and green to my reds and yellows.
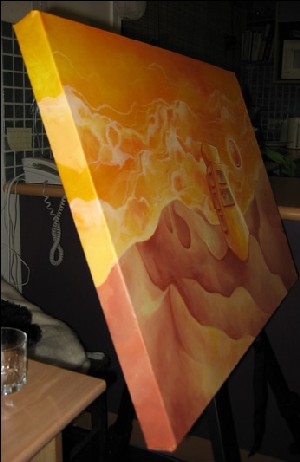
I double-check the sides to make sure they match up with the front of the painting. I think painting round the sides adds an extra element of refinement to your canvas, and it means you can bump up the price a bit too, hehe.
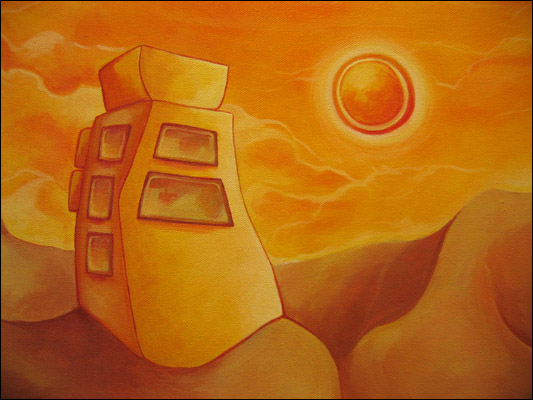
And finally... it's finished :)! I sign the piece, attach hanging wire to the back of the canvas, and it's ready to go on someone's wall.
I hope that was interesting :). Let me know if you have any questions, or any suggestions for improving my methods.
Harmony Steel is an Australian artist and past member (as well as continued friend) of EBSQ. More of her work can be seen at http://www.harmonysteel.com.


