- Home
- Education
- Drawing Painting Pastels
- Live Studio Portraits
Synopsis: First part in a series of basic portraiture painting. Getting started, materials, paint colors used, background, skin tones, shading. Main emphasis on oil painting as a medium (or an extra large!)
I. The ingredients
1. Something on which to paint: paper, canvas, panel, rock, the inside of your last Betty Crocker cake box. (Properly primed for your medium of course.)
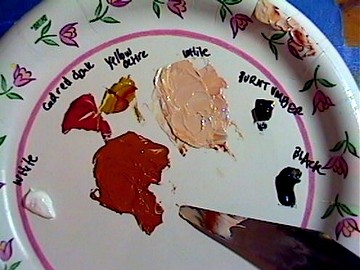
2. Paint: Oil, Acrylic, Watercolor Primary flesh tone colors: Cadmium red dark, and yellow ochre. Will also use white and some Naples yellow, burnt umber, maybe sap green.
(Do your portrait subjects often look bruised?If they are not boxers perhaps you have been using Alizarin Crimson in your skin tones. This color has a purple/blue undertone and is the cause of the bruised appearance. In general Alizarin crimson is avoided for skin tones.)
II. Figure placement: To sketch or not to sketch, that is the question.
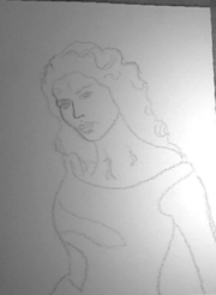
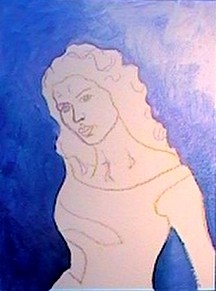
Personally I prefer to sketch a rough outline of my subject in a very faint pencil (sketch jpeg exaggerated line color), some people will just rough in the figure basics with thinned down paint, and then either paint over or remove as they get to it. Others just start from nothing. So really this is a personal preference.
III. Background: or the dog that would not get out of the shot!
Background can be just a simple color wash, usually dark enough to set off the figure, I like to graduate from dark to light.
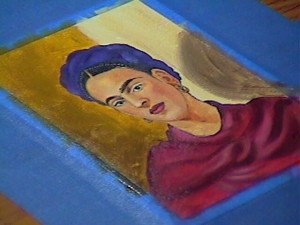
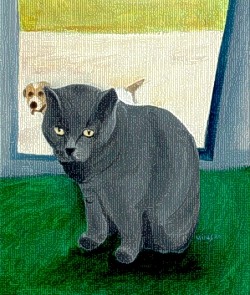
Or the background can be used to emphasize the figure, illustrating more about the actual person or situation. Ex: I was taking some shots of my Dad's cat to paint, and unwittingly my sister's dog showed up in every shot in the background. So when I painted the actual portrait of the cat, I put the stupid dog in the background of each painting. The background, while not the focal point, became an amusing side bit of information adding to the actual figure.
IV. Skin tones: Not so hard after all!!
The skin tone color is produced by mixing cadmium red dark with yellow ochre. This is usually the mid range skin tone (much darker than you would think). This can be lightened with white to produce a very nice flesh color (don't go too light or your highlights won't show up). Burnt umber will function as the darkest skin tone and can be mixed with the mid range mixture when needed.
V. The elusive shading to produce depth.
To produce the illusion of depth, you really need a strong contrast between your lightest light and your darkest dark. If all of your colors are midrange your figure will not

For example: the point on the nose is the lightest area on the human face, the actual nostril color will be very dark. Putting these two contrasts together will help to give the illusion of depth. Also the pits around the eyes are generally very dark while the forehead is lighter, again an area that helps establish depth. Always remember: LIGHTS COME FORWARD, DARKS RECEDE. Having this contrast is what will give you depth.
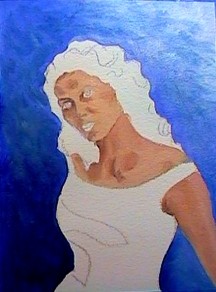
- highlights before blending
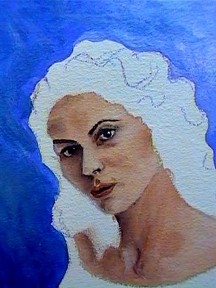
- highlights after blending
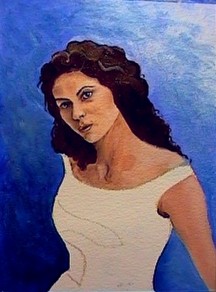
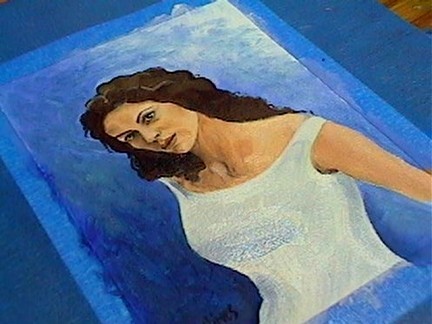
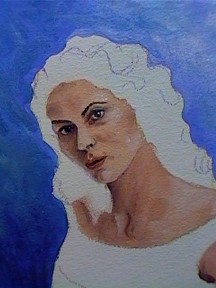
- addition of hair
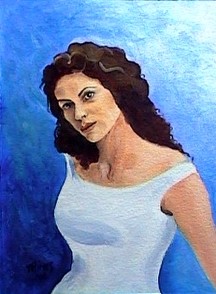
- finished portrait
A few side notes: Because I am unable to have a portrait studio space, or the time involved in working with live models, I work with photographs. It is important to have a photograph that has a lot of contrast in the figure. Usually photographs taken in natural light (as opposed to lighted with a flash) will produce much better portraits, because the most important thing to achieving a good painted portrait is contrast!! You need to see good contrast in the face, because when painting you need to be able to establish these contrasts to produce depth. A flash lighted photograph is often very washed out where contrast is concerned, because there is not a single light source to produce contrast.
Here's a take home exercise for you. If you have a way to take digital images of a painting you are having trouble achieving a good depth on: take your digital image, and convert the image to grey scale. (jpeg) Then compare your color image with your greyscale image. You should be able to easily see that you do not have enough LIGHT/DARK contrast in your image, without all the colors getting in the way.
Thank you for attending. I hope you have learned a bit more about portraiture, and will have fun trying it at home!