- Home
- Education
- Drawing Painting Pastels
- Live Studio Charcoal
I think charcoal is a very intimate and romantic medium. Each marking made is a reflection of the artist's expression because the points are so sensitive to how the artist is handling the instrument.
Lately I have been experimenting with different surfaces. For this demo I chose to paint on a 9"x12" hot press Arches paper with acrylic paint that I mixed out of yellow ochre, black and green, then mixed with Liquitex ceramic stucco gel to serve as tooth for the ground so the charcoal will adhere better (first try, wish me luck!).
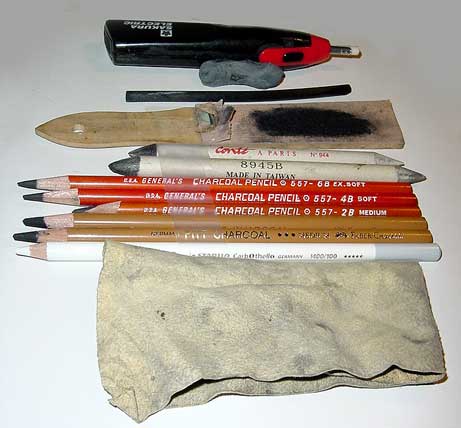
Materials from the top:
Electric eraser (for pointed and /or hard edge erasures), kneaded eraser (a malleable material to custom fit areas you want to erase or lighten), vine charcoal (I prefer the medium hardness, this is used to lay in the drawing, it's easily rubbed off), sandpaddle sharpener (I use as sharpener for the vine charcoal mainly), Conte stump (I love Conte brands for charcoal and pastels!), "made in Taiwan" stump (you wouldn't catch me using this with charcoal on paper but this worked better on my experimental surface), General's charcoal pencil 2B, 4B, 6B (used in the order because the points go from hard to softer and also line get darker as it gets softer), Pitt charcoal medium and soft (they make darker markings than Generals), Carbothello white (I prefer this for highlights over the charcoal white that General sells because it's more visible), chamois (used to shake of most of vine charcoal without earasing the markings).
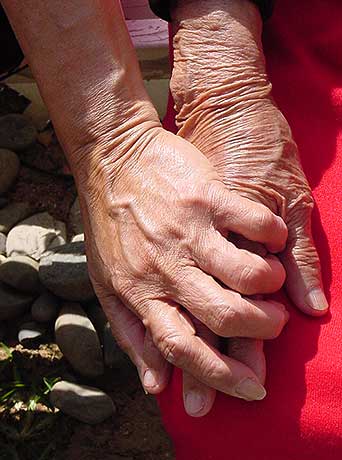
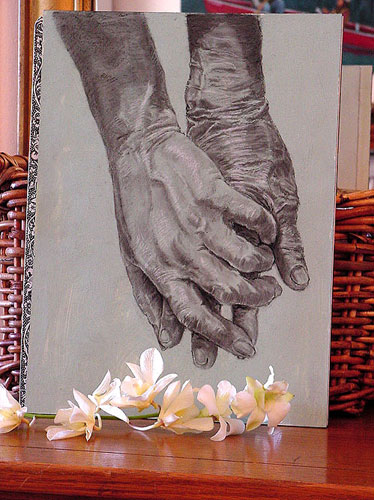
This piece is based on a portrait of my Mom's and grandmother's hands. It's entitled: "69 on 92" Here is the image I photographed early this year.
Lately I've been drawing/painting most my of images right off the computer monitor because I use a digital camera. Also, the colors are never as rich as they are viewed from the monitor.
It's a good practice to judge your representational artwork based on your drawing, the values and the edges/perspective. I think a skillful drawing is a foundation of a pleasureable artwork.
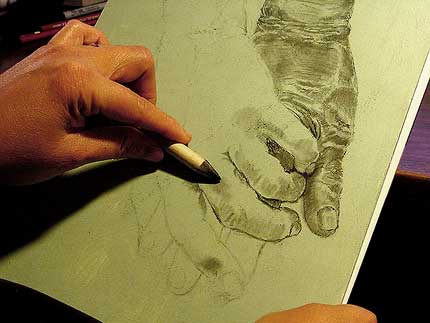
My charcoal drawing process is basically drawing the piece at least 4 times. After the vine charcoal, I start rendering the image with 2B charcoal. I find with charcoal that I almost always alternate charcoal and stump, or sometimes, just draw with the stump for soft markings. Again, always comparing the relationships between shapes, values, etc.
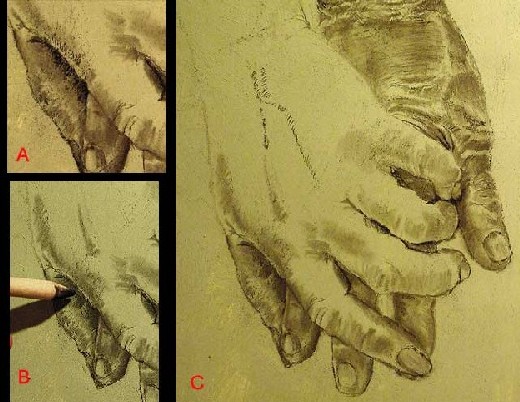
- A.) Instead of drawing bold contour lines, I prefer creating edge lines by sketching the darker area next to the lighter area; the lines are not so hard and distracting. It's difficult to avoid drawing bold lines though, but I try to minimize as much as possible.
- B.) Remember to soften your edges with the stump, especially when drawing flesh.
- C.) For defining veins, I prefer to sketch the darker parts instead of just one line and then go over it and softened with a stump. While sketching your lines, always keep in mind the shapes of what your doing. For instance as in image C, the sketch lines I did for the veins follow a tubular shape to give that illusion of veins under flesh, especially after you soften those lines.
Here are the drawings from stages 2B to 6B. When I reached 6B, I had determined how dark I wanted my darkest to be.
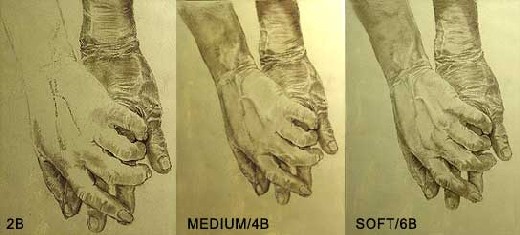
It is important for the drawing to reach a point where it is done before I can consider adding the white heightener to depict the highlights.

Although I look forward to this part of the charcoal, I must confess that it's also a dangerous decision to choose to add the white sometimes. This technique is most effective if I only drew the top two brightest highlights. I've done a beautiful charcoal portrait that ended up looking like the Tin Man because I got carried away using too many highlights!!
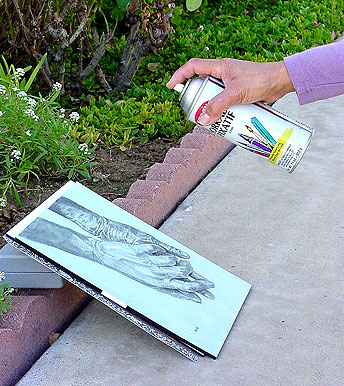
Find a well ventilated area, away from your open doors or windows. Prop your art piece at an angle so that you can spray your artwork evenly. Using continuous left to right and right to left motions, spray your work with fixatif, going past the edges of your surface and overlapping each row. Work from top to bottom. Let it dry then turn the piece around, from vertical to horizontal, and spray another coating.
Leave it out to dry after you make sure it's safe from pets, children, people and flying birds.
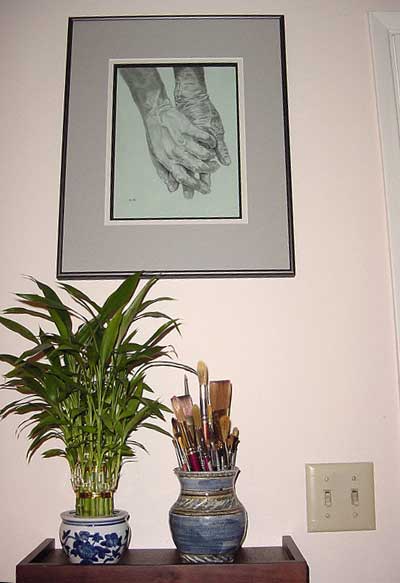
Once your charcoal drawing is ready, frame it behind glass. I've framed a charcoal without matt board before but I had the framer put spacers between the artwork and glass. Most of the time, I use two or more matts.
Thank you for joining me through this demo. I hope I've successfully shared how much I like this medium!
~erika


