- Home
- Education
- Printmaking Pyrography Scratchboard
- Live Studio Scratchboard I

Before we begin, a bit about the material:
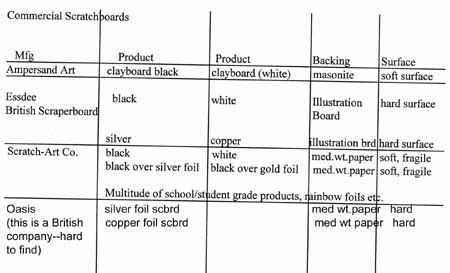
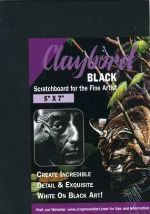
Commercial scratchboard are made by Ampersand Art, Essdee (British Scraperboard), and Scratch-Art Co, also Oasis (makers of foil scratchboard, also British) are the four manufacturers I know of. They each have different qualities and attributes. I don=t think one is better than another, they are just designed for different uses. Ampersand is backed with masonite, is a very easy surface to work with, but I personally find that Essdee has a harder surface and it gives finer lines. Ampersand takes color easier.
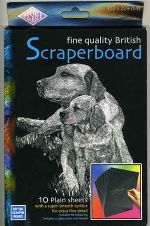
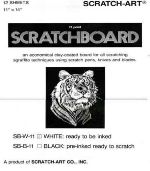
Essdee produces a great black scratchboard with a nice hard surface although their white scraperboard as they call it, is very hard to find. Oasis Ltd. is a British company and produces a great silver and copper scratchboard that is on med. index paper. They also used to produce several types of texured scratchboard which is a lot of fun but I have not seen it in years. Scratch-Art out of New England produces mainly school products but some of them are very interesting. I like their white scratchboard and am using it in this demo. They also make a gold and silver board but is also not a professional product but is fun for kids. You might want to consider mounting any of these thinner scratchboards to illustration board or conservation mat board , because they are easier to work with on a stiff surface and are more stable for framing.
The best thing to do is try them all and decide for yourself. You can also make your own with a little effort and patience.
Basics would be hard pencil or ball point pen for transferring a sketch, a soft pastel pencil for drawing fee hand on black scratchboard. Transfer paper (white, yellow, or grey) whichever will work best on whatever kind of board you are using; black or white. Yellow is nice because it distinguishes from uncut lines, as once they are cut, you will see white, a brown conte crayon or graphite to rub on the back of your sketch to get an outline of your drawings to the board if you don't want to use transfer paper. Lo tack tape for adhering sketch to board. Computer (if you are using Photoshop or other image program.
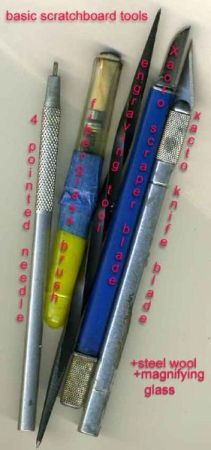
Basic Scratchboard Tools
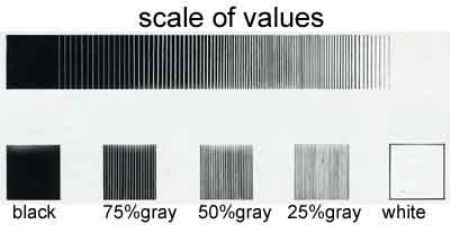
Develop a scale of values because that is the very heart of scratchboard art. Value is the factor that indicates the AMOUNT TO BE CUT. Gain a little control over this concept and learn to see the many shades of gray that exist between black & white.
This is what makes scratchboard magical and intriguing.
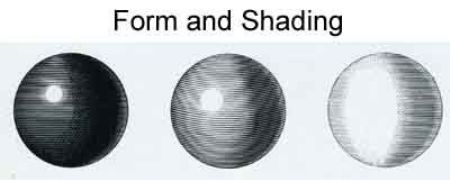
Practice drawing volumes and shapes. Get good at shading using only lines. Try not to forget where your light source generates from. This is sort of art 101, but it's always critical.
Achieving the illusion of halftones by using only black and white lines
You can create your own personal grayscale palette (giving the illusion of halftones) by using black and white lines only. Draw a series of boxes and begin filling them in with as many shades of gray as you can by using only one tool. Use only straight lines for this exercise. Stand back and see which ones are the lightest and which are the darkest. Your eye will blend the black and white together and it will appear to be a halftone. This is perhaps the most fun about scratchboard is achieving the look of a half tone by using black and white lines.
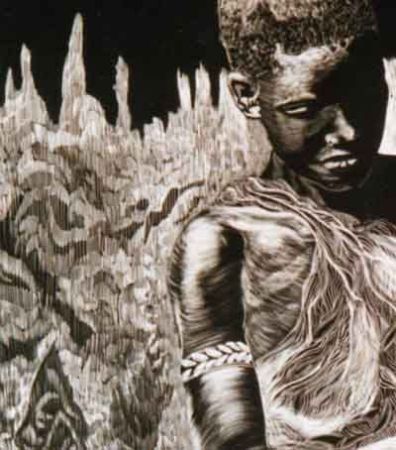
In this detail from one of my larger pieces, you can see how using only lines gives the effect of half tones, even though close inspection reveals there are none there, it's a trick of the eye.
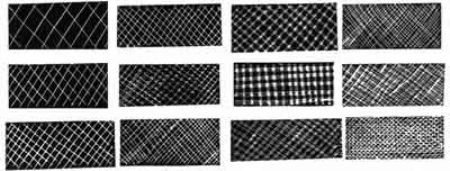
Crosshatching
Crosshatching is done by drawing one line, picking up your hand and then drawing another line with equal spacing between strokes. After completing the lines in one direction, change to another diagonal direction for a 2nd set of lines. There should always be a pause in your rhythm after completing one line. If you leave your scratching instrument on the surface and just draw from one line to another, the effect will be sloppy. Really good crosshatching takes a lot of practice to get expertise.

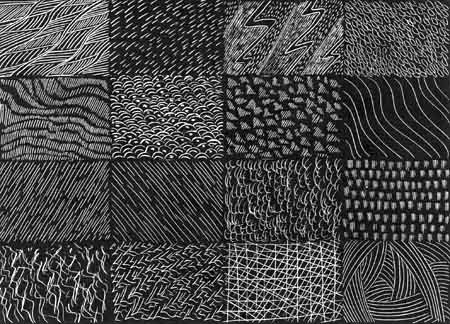
Texture is determined by the method or technique of cutting.
As an exercise, divide a sheet of scratchboard into boxes. Fill each box with a different texture, trying different tools, etc. Keep the textures repetitive and be aware of the negative spaces as you scratch. If you are making little circles, dashes or dots, keep them the same size & the same distance apart.
Stand back and look at your boxes from a distance. They will begin to take on many shades of gray. You have created texture and at the same time, also created a grayscale.
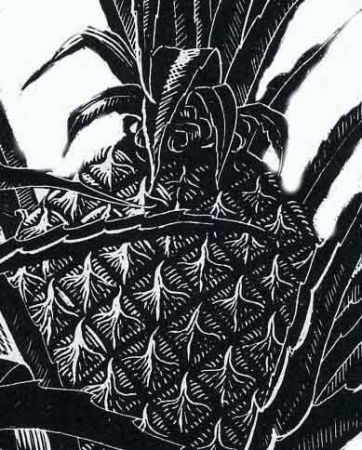
A pattern is a texture that is repeated and defines the character of an object, like this pineapple.
Reproducing scratchboards as hand colored originals
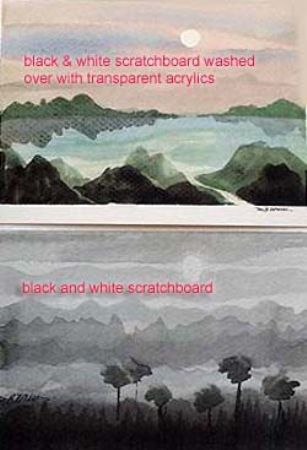
If you have ever experimented with making a color lazer copy of a delicate watercolor and been more than disappointed in the results, you will understand how it just doesn't work well unless you spend thousands on a state of the art machine. You can get great results by using only black and white lines reproduced on a lazer copier and then hand color your editions. You have many coloring options using color pencils, watercolor and/or transparent acrylic washes over your black and white reproduction. This works nicely on small art and greeting cards. Here I've used a thin wash of transparent acrylic over my scratchboard reproduction. This gives me an original or a limited edition if I want to go that way.
Demo 1 Step 1-- using Black Scratchboard
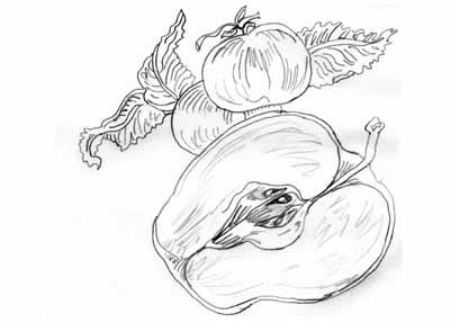
For this demo, I'm using a very simple sketch of an apple. The first demo will be done on black scratchboard using Ampersand clayboard black and the second demo will go through a white scratchboard using Scratch Art white scratchboard paper.
Start with a line art sketch that has a nice composition, interesting bold shapes, and lends itself to holding three values within the final drawing, light, medium and dark.
Step 1. Line art sketch
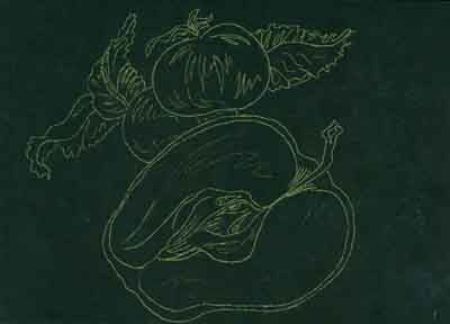
Demo 1, Step 2, transferring the sketch
The line art is transferred to the black scratchboard using light pressure and a hard pencil and yellow transfer paper. Yellow transfer paper is nice because you can easily see it on the black scratchboard and you can tell what you=ve cut from what you=ve marked; since your cut lines are white, you can easily distinguish between the two.
Note: Here's another technique. Because the Ampersand clayboard black is so soft, you can just you lay your sketch over the panel and use a medium pressure & ballpoint pen to transfer you sketch to the panel. The pressure of your pen over a thin paper (tracing or vellum) leaves an impression in the panel that is easily seen. If you are using Essdee scratchboard, which has a harder surface, you might want to use more pressure when you transfer your drawing. If you have a hard time seeing it, tilt it a little to catch the light better.
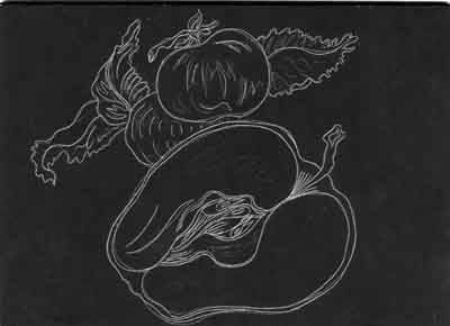
Demo 1 Step 3
Scribe very lightly with an exacto blade or scraper nib over your yellow lines. Don't use a lot of pressure here. As your drawing progresses, you may wish those strong white lines you used in the beginning were much lighter, or maybe not there at all. All this transferring does is give you a placement on the page and a place to start. You can draw directly on the black panel in a light pastel pencil if you like. Drawing freehand is fun and it's up to you which technique to use, but for the sake of demo purposes, I'm using a previously drawn sketch and transfer paper. There are no rules and it's not important what technique you use. What counts is the final product and if you liked doing it enough that you'll want to do another one. Do what is comfortable for you.
Demo 1-Step 4
Always etch out the whitest and brightest areas first. This gives you a good start on setting your values and what your eye will see first. I used a wide scraper tool to etch out the whitest and the largest areas. Since this is a very simple sketch, there is only one large light area.
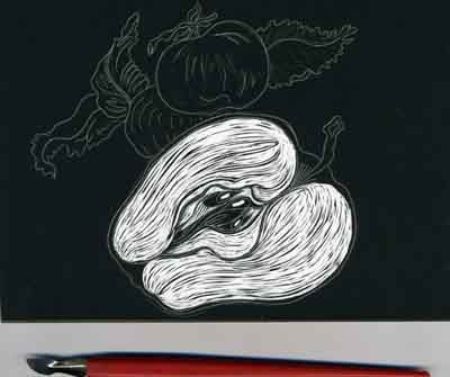
Demo 1, Step 5, Modeling the form
Next, I used steel wool that I made by compressing fine, dry steel wool into a little ball and holding it with a set of tweezers for a handle. I go over the cut apple white because it adds another shade dimension and gives a more realistic modeling technique. I have also used steel wool in the highlighted shapes of the background apples and leaves.
Note: another technique is to use a fiberglass brush (made by Ampersand). This brush is very abrasive and removes a lot of black quickly. You might want to start with steel wool to get the feel of this idea before going to the fiberglass brush.
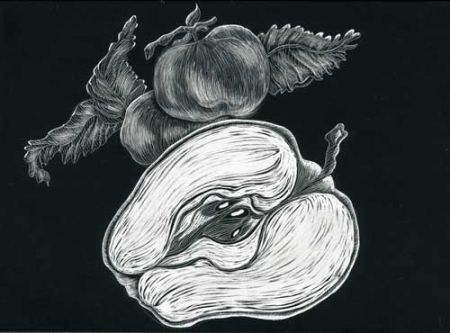
Demo 1, Step 6, Finishing the apples
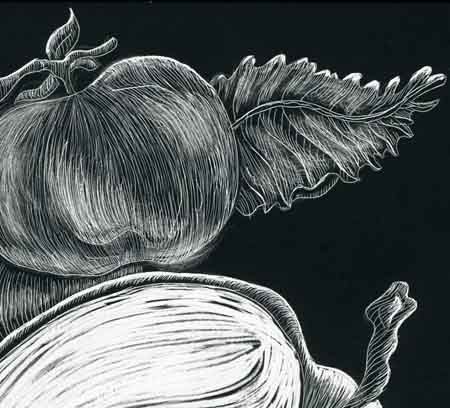
With my Xacto blade I scribe very fine lines and detail to finish the panel. This is a simple panel so there isn't much etching to do. Note that the scribing is done to give modeling to the shapes of the background apples, leaves and stem. Highlighted areas have more etching and I am using a 12noon light source (see highlights on the apple stems and leaf tips). The large cut apple in front is scribed all around the outside. This is not so much to model the object, but to make room for the future addition of the color red. I have to etch a fair amount because the red can only appear where the white is now. Putting red coloring over the black will show as black.
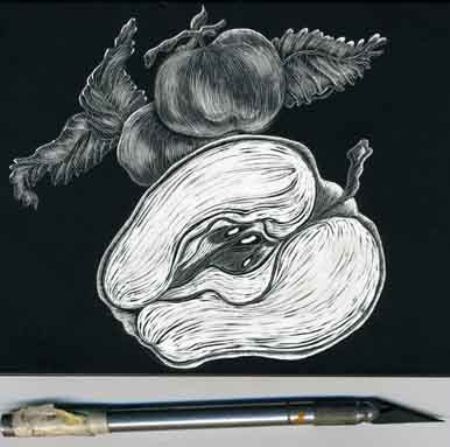
Here hopefully, you can see more detail. A very light pressure works well when scribing fine lines. The fine line etching can't be done too quickly, and you need to check what you've done pretty often. I step back and look to see my progress and check my value scale. Remember that what you etch out will have color and that will be the only place that has color. In this style of using scratchboard, all else will be black. When we do the color demo, I will give you some alternate ideas you can try, but for now work a lot in black and white and you will be surprised how far you can take it.
Demo 2, Step 1, White scratchboard
I'm using Scratch Art white scratchboard paper and cut it down to the same size as the 1st demo piece, which was 5" x 7". The Scratch Art paper is a medium weight paper and is nice to work with but it's a little thin. You can mount it to card index or 2 ply matboard or illustration board if you like first. It depends on what you want to do with it. If it is going to be framed, I would definitely mount it to at least a 2 ply conservation mat board to protect it.
Step 1 Here is the same as in the first demo where we transferred the sketchâthis time we can use grey transfer paper or yellow paper. If you don't have transfer paper, you can use a graphite or conte crayon stick on the back of your sketch. When you trace over the sketch, the conte or graphite will transfer to the white scratchboard. The outline you trace will be like a silhouetted image. This is where the two types of scratchboards differ most.
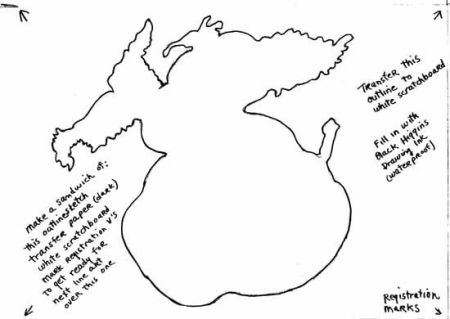
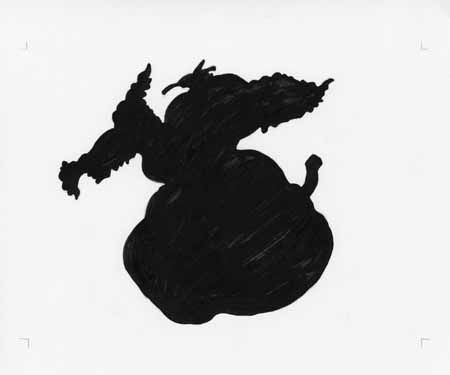
Demo 2, Step 2, White scratchboard inking
Now you have an outline silhouette shape. Use a fine good brush for the outline and a small flat brush to fill the ink in. Fill it in completely with black Higgins drawing ink. Use an even application of inkâyou know it will be even when you see it drying at the same rate. Shiny areas will have more ink, dry slower and may leave a thick blob if you are not careful. This will be difficult to scratch through well and it may chip if application isn't even. I like Higgins drawing ink right from the bottle. Winsor & Newton black ink is too dark and does not match the color of any other scratchboards on the market.
Note: You can use Ampersand clayboard (which is white). If you can get it, you can also use Essdee white scratchboard but it's hard to find.
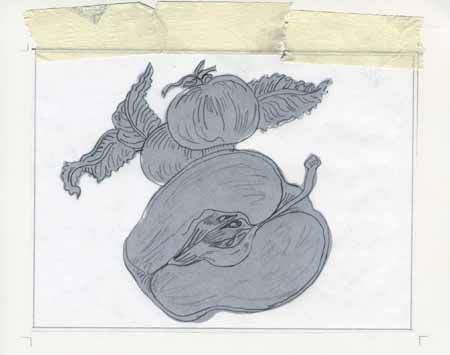
Demo 2, step 3, white scratchboard, line art
Use a low-tac tape to adhere your tracing paper, or vellum line art sheet over your silhouetted and inked in apple image. I used the same sketch as in the first demo. Use your white or yellow transfer sheet between them and transfer basic shapes of the inside of the cut apple, the 2 small apples, stem and leaves.
Demo 2, step 4, White scratchboard, lines over black inking
Now that you have transferred your white or yellow outlines, you are ready to begin etching away your first values.

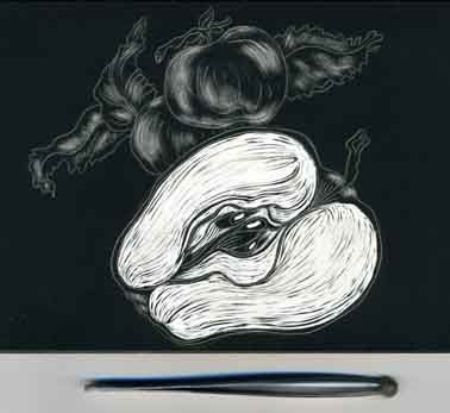
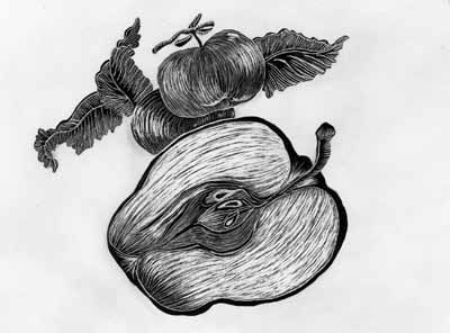
Demo 2, step 5, white scratchboard etching away the black.
I have basically followed exactly the same steps in demo 1, scrape away the lightest and whitest values first (the cut apple interior) with a wide scraper tool, highlight and model the small apples, stems and leaves with a fine line tool (exacto blade)
Here is the exception, because of the thin scratch art paper, I am unable to use the steel wool without damaging the paper, so I have stuck to using lines and taking black away through a line, not a brush technique. I was able to remove small areas around the stem and the leaves to achieve a delicate look. I inadvertently reversed the seed area and removed the opposite of what I did in the black clayboard demo. I intend to do something different with the final outcome of this drawing.
You might be asking yourself, why the trouble of learning 2 techniques? What's the difference? It isn't just the difference of taking more time to scrape away more white from a black surface-it ends up having a different look.
Well, if you took this drawing and wanted to add another dimension, you could now paint with acrylic or gouache the background areas adding a vibrant colors, muted colors, monochromatic colors etc. whatever your fancy. You could use colored pencils in the background, gold leaf, or just leave it as is. Remember that in this type of a greyscale drawing in scratchboard you will get much finer lines than you could ever get using pen and ink, or graphite.
In the next Live demo I will color only the background of this
drawing and you will see what a different effect the finished drawing
will have.
Correcting mistakes
Just a note about mistakes - You can correct small mistakes by
making a mixture of 1/3 Higgins drawing ink & 2/3 water. Touch
lightly to your accidents with a very fine, small brush. Winsor &
Newton black ink is too dark and you would have to thin it out a lot.
Higgins is closer to the black color of most commercial scratchboards.
If you have a very large area that you want to rework, lightly steel
wool the whole area, apply a thin coat of ink & water mix. Let dry
and do it again, try to match the rest of the board. If it looks shiny,
you have too much ink and not enough water.
Comparing side by side the black and white scratchboards and their details:
cut apple on white board

detail
cut apple on black board

detail
I hope you had fun and that you'll join me next time in April on
EBSQ Live to learn about coloring techniques in scratchboard. I want
you to come back and see what these drawings look like when they are
wearing a little color
Where to buy
It's probably best to check on-line because new distributors are happening all the time but I have found that Jerry's Artarama carries a lot of different brands of scratchboard, and he gives discount codes pretty often.


