- Home
- Education
- Mixed Media and Collage
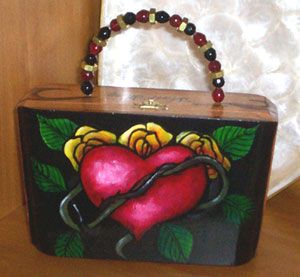
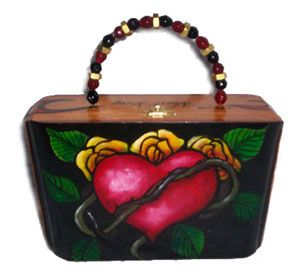
- Live Studio Cigar Box Purse
The cigar box has long been the inspiration and source of materials for resourceful artists and crafters, from creators of tramp art at the turn of the 20th century to today. One of its current incarnations is the popular cigar box purse.
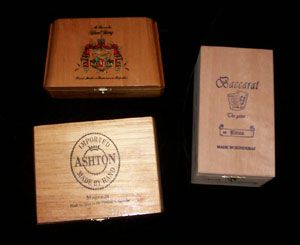
I first began making cigar box purses several years ago when I purchased a small lot of empty cigar boxes on ebay. There are many different types of cigar boxes and it can be fun, and sometimes frustrating, trying to find the type that is right for you. You might pay a little more for your boxes on ebay, but it can be easier than trying to find them locally, and you can choose just the type and quality you want. Locally, smoke shops will often sell you their empties for a small price, but you might find them scarce if you happen to be in competition with ebay sellers, crafters, and other artists. Here is an example of some cigar boxes I was lucky enough to buy at my local smoke shop.
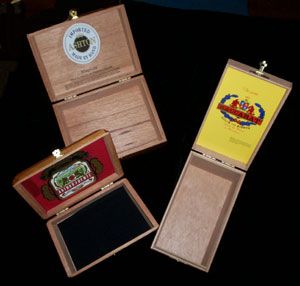
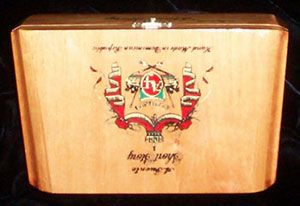
I prefer the wooden cigar boxes that already have latches (make sure your latches work and that your lids aren't warped) though there are companies that make latches, hinges and other hardware that can be attached to cigar boxes for pursemaking. There are also various ways one could make diy latches for boxes that don't already have them using buttons, beads, ribbon, string etc. But for this demonstration, I will be using a wooden cigar box that already has its own latch. I had a few cigar boxes that I could choose from, and I chose the one that seemed to best fit the design I had in mind.
Having decided on my cigar box and design, it is time to prepare the box for painting. Though typically I paint my boxes, there are a variety of ways to embellish and alter your cigar box. One that I don't see much (but would like to!) collage/mixed media, and I think a cigar box purse would be a great use for paper ephemera and found objects. This is actually one of the first things that attracted me to cigar boxes as an art object, having seen them altered and made into modern day "shrine" boxes. I have also seen some use mosiac tile and/or glass on the boxes, as well as beads and polymer clay. Others attach prints to the boxes, though one should always be mindful of infringing on the copyright of other artists if the art is not one's own. For the original artist, however, creating a cigar box purse does certainly offer additional opportunity to offer their own original images, one or multiples, in print form. Some working with the cigar box may simply clean it up, line it, and attach a handle. But we are artists here, and no artist worth his or her salt would willing give up such valuable art real estate and leave the box virtually unaltered!
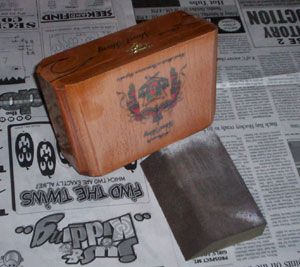
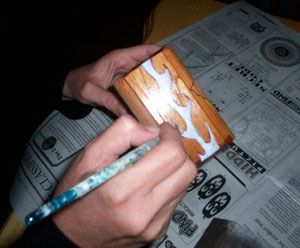
In order to paint my box, the first thing that I must do is remove some of the finish via sanding. First I decide what areas I want to paint, mark them off, and begin sanding. In this case I decided not to sand the entire box as I am leaving some of the finish and printing original to the box and incoporating it into my design. After sanding a damp cloth takes off the residue.
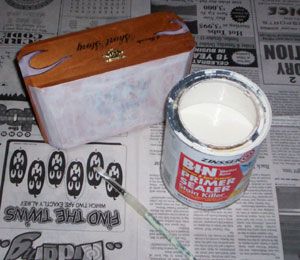
When the wood is dry, it is time to apply a primer. As this box has been stained by its manufacturer, it is probably a good idea to apply a stain killing primer to keep the stain from leaching into your beautiful artwork. Depending on your preference of painting surfaces, you may or may not want to apply a coat of gesso over the stain killing primer. In this case I did not and found the surface a little slick and difficult to blend my paints, so that next time I will remember to apply my gesso for a little absorbency and added "tooth."
Now it's time to paint. From this point on, you may paint your box as you would any surface. Pay attention, however, to your edges (you can tape them off with painters tape if you like.) Also be careful not to paint over the hardware on the box. This can be difficult. However, if paint does get onto your hardware (and you don't want it there) use a small amount of paint remover on a q-tip for oil paint, or a little alcohol or nail polish remover for acrylics.
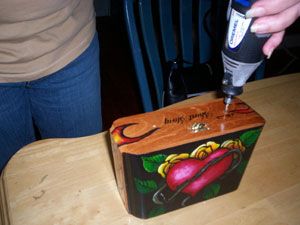
When my painting is complete, it is time to seal and attach my handles. I like to apply the sealer first so that I am less likely to scratch my artwork as I am drilling and attaching my handle. It probably also makes sense to drill for the handles prior to painting. I tend not to do this, however, because I normally don't use a uniform size handle and decide how big it will be depending on what my painting looks like.
Once my holes are drilled it is time to make my handle. For this purse I am using memory wire sold in the beading section of your arts and crafts store. It is called memory wire because by and large it keeps it shape and is very stiff. You might not want a more bendable wire because, even though it might be easier for you to work with, it could wind up looking a little shabby and bendy if your purse gets any use. Premade wire handles for beading are pretty readily available at your craft store now as well if you're uncomfortable making one of your own. I tend to use the wire handles I make myself because when I first started making purses from cigar boxes they were impossible for me to find locally. Also I am able to fit beads using wire that I cannot with the premade handles.
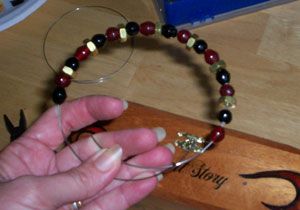
I cut the memory wire about twice as long as I want my handle to be. Then I arrange my beads. In this case I thought it would be fun to add some brass nuts to my beads to give it a little edge, and to illustrate that you need not stick with just beads. Anything with a hole, or that a hole can be drilled in, can be used for your "bead." Beaded handles also aren't the only handles that can be used for your cigar box purse. You can make a handle out of dowels or scrap wood, handles from old luggage, drawer and door pulls, handles from old purses found at the thrift store, old belts, etc. Beaded handles are certainly the most common which is why mixing up the beads will make your purse a little more unique.
Once I've beaded my handle I insert each end into a hole. At this point I need to "hook" each end of my memory wire onto one another. To do this I bend one side and crimp it. Then I bend the other close to its mate but not close enough for the two crimped ends to touch. It is a little hard to describe this process, so I created a small diagram to illustrate.

I do this so that when I hook one wire onto the other the wire will be taught enough to stand on its own. Once I have my wire nice and taught I clip the ends and try to weave it through itself to minimize any sharp edges. If you are concerned about edges in your purse, a strip of felt or similarly substantial yet flexible material can be glued to cover it.
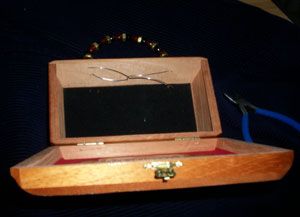
At this point you could also line the bottom of your purse, though lining the top of the inside would cover up the great cigar labels that I think are part of the charm of using an authentic cigar box for your purses. That and the great smell that comes from a combination of the woods used and the cigars stored in them.