- Home
- Education
- Drawing Painting Pastels
- Live Studio Pastels
Live Studio- Pastels with Karen Utz
Karen Utz
Drawing, Painting, Pastels
Thanks for joining in this evening for my pastel discussion and demo. Also, thanks to Melissa and EBSQ for giving me the opportunity to put this together. I'm relatively new to these live chat sessions, so hopefully everything will go as planned! If not, please let me apologize in advance!
I thought I'd spend just a bit of time discussing tools and materials, and then I'll do a short pastel demonstration.
Just as a bit of background on myself, for quite some time, I had primarily been working in acrylics. About 8 months ago I bought my first small set of pastels, started experimenting, and have been hooked ever since.
The immediacy of pastels is the quality that I love the most. As the description of this event said; no opening and closing of paint tubes, no mixing colors on a palette, and no cleaning of dirty brushes. I just tape a piece of paper to my board and I'm ready to paint!
There are several types of pastels; soft, hard, oil and wax. This evening I'll be talking only about the soft and hard variety.
Pastels are pure vivid sticks of pigment held together with a bit of binder. The main difference between soft and hard pastels is the amount of pigment and binder in the mix. The harder pastels, available in both stick, and pencil form, have less pigment and more binder making them great for detail line work.
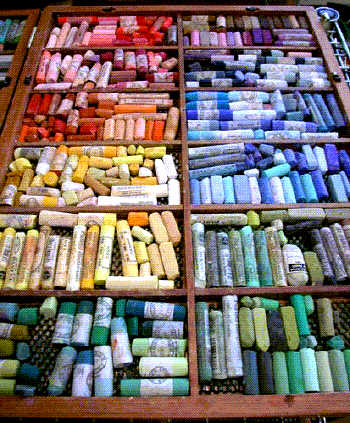
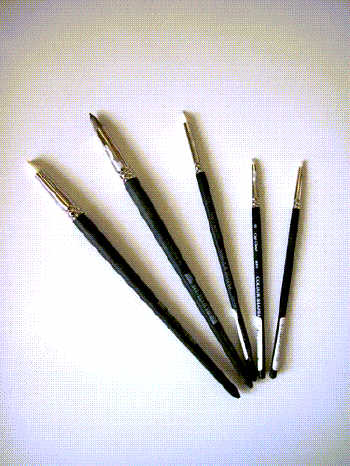
The brand of harder pastels sticks that I use, are called NuPastels. These are relatively inexpensive (a set of 96 is around $50 to $60). They are long rectangular sticks that can be sharpened to a point with an xacto knife. These are some of the NuPastels that I use:
I typically use the NuPastels for blocking in the major local color sections and for doing detail work, where I may need a sharp point. I have been known though to use only NuPastels for an entire painting, as in this painting, an exercise from one of my art books. The entire piece was done with just the NuPastels:
The softer variety of pastels I typically save until the very end of the painting as the amount of pigment deposited on the paper can be quite thick. The softer varieties are great for highlights and scumbling of color over areas of your painting.
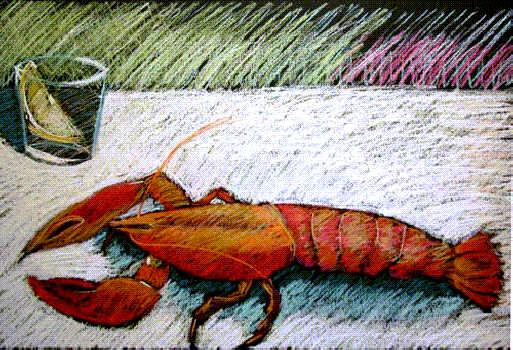
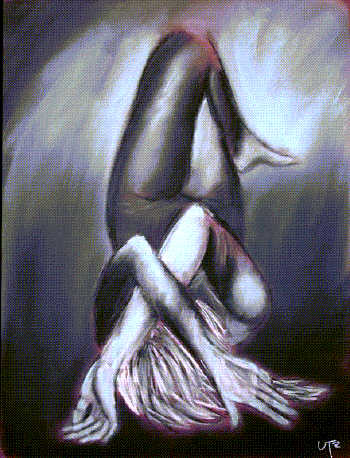
There have been times however when I've done entire paintings using just the soft pastels. Because they deposit so much more pigment on the paper than the harder pastels, you have to be careful not to quickly saturate the tooth of your paper. However, the soft pastels create a wonderful look on a finished piece. This piece is a mixed media piece where I used charcoal and only soft pastel. You can really see the thick build up of pastel, particularly on the arms:
Pastels are available in an enormous range of colors. Some manufacturers have as many as 500 to choose from. Pastels vary in texture, quality and size from manufacturer to manufacturer.
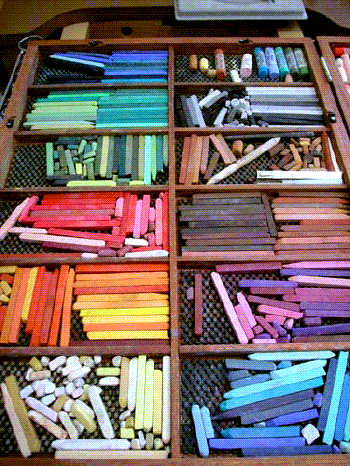
When I started out in pastels I had an entire set of the NuPastels and a small set of softer pastels manufactured by Winsor & Newton. As time goes on, my collection of soft pastels continues to grow. I've now collected several brands ranging from Schmincke, Unison, Great American, Holbien, Sennelier, Diane Townsend, Terry Ludwig, and the list goes on. As a pastellist, you quickly realize you never have enough pastels! These are some of my softer pastels:
Pastels come in many different shapes and sizes. Many are available in both boxed sets, but can also be purchased individually so you can add to your collection slowly. It also allows you to see which brands you prefer without buying an entire set.
Many pastels are cylindrical while others are square, and the handmade pastels come in a variety of odd shapes. These are some of odd shaped and unusual iridescent pastels that I have:

Each manufacturer produces a range of pure colors. Each of these colors are then lightened or darkened to various degrees by the addition of white or black, creating a range within each color.
SUPPORTS: Pastels can be applied to almost any surface that has a certain amount of texture for the pastel to grip to. There is a wide variety of pastel papers and boards available. They range from having almost no tooth (ultra smooth - and difficult to work on) to having a heavily sanded surface.
You can create your own pastel surfaces by mixing a bit of pumice or marble dust with acrylic medium and even add some acrylic color, if you like. Thin this down a bit with water and then paint on several coats to achieve a smooth sanded surface. I usually use water color paper or illustration board to apply this surface to.
Additionally, there are all colors under the rainbow to choose from in pastel papers. I personally have a passion for working on black paper. My pastel demonstration this evening will be on Strathmore black paper.
Other items that would be helpful when working in pastels are a kneaded eraser for cleaning up dust and stray marks. For blending; tissues, Q-tips, stumps, color shapers, and my personal favorite, your fingers. If you are using a sanded surface though, be careful of blending with your hands!
Color shapers are similar to the tools used for working with clay and are great for getting into those tight little spots for blending. They have a rubber tip and come in a variety of sizes and shapes:
You'll also need lots of paper towels for cleaning your pastels off on as you are working with them. My husband says we should have stock in the paper towel companies! I used to use an old towel until one evening when my husband threw that old towel in with a load of laundry¦..the rest is history (as well as the clothes!).
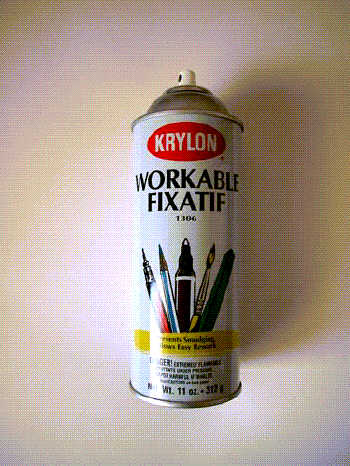
Spray fixative allows you to restore some of the tooth of the paper when it becomes clogged with layers of pastel. The fixative will darken your pastel colors, however you can then go over this with a fresh layer of pastel.
I only use fixative between the layers of my painting. I never use it on a finished painting as I find it dulls and darkens the colors too much. I'd rather just handle it gently until it is matted and framed under glass.
And as a final note before getting on to the demonstration, one of my favorite pastel books is titled "The Pastel Book", by Bill Creevy. It has a fabulous section on tools and materials and covers not only soft pastels but oil pastels and oil sticks. I would highly recommend it.
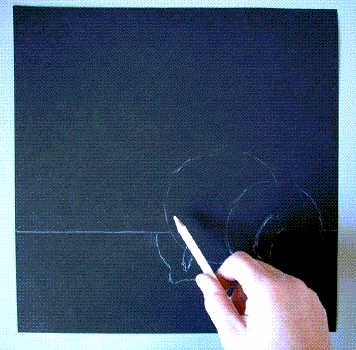
Okay¦the demonstration. This is going to be a fairly simplistic demo of some vegys¦.2 onions on black paper. I want to achieve a contemporary look to the finished painting, so I won't be doing any blending in this piece (except for the blending that occurs naturally when layering colors). Also, I'll be doing the entire piece using just a few NuPastels.
As I said previously, I have a passion for working on black paper. So, I'll begin this piece on a sheet of Strathmore black pastel paper and lightly sketch in my composition in white pastel pencil. Typically I have my sheet of paper taped up on my easel with the easel tipped slightly forward so the pastel dust will fall into the tray below, makes for a much easier cleanup. For this demonstration, however, I've just laid the piece flat on a table.
I also like to pick most of the colors that I know I'll be working with and put them in a small plastic container lined with paper towels. For me this has two purposes; the pastels aren't rolling all over the place and if I'm standing at my easel it's easier to hold this in one hand instead of laying the sticks on my easel. Secondly, I can use the paper towel to wipe the pastel off on if it becomes dirty. You'll see here that I work with large sticks and the bits and pieces that I've broken off. They all work the same!

I start applying the base layer color to the first onion going with the shape of the onion. I use the top edge of the stick of pastel to lay in strokes of color.
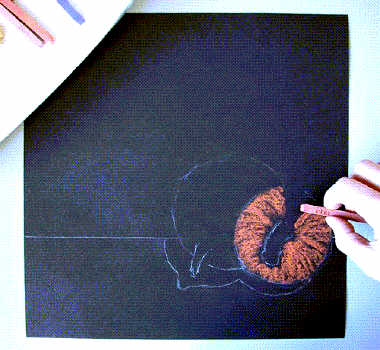
I continue layering different colors onto the onion, allowing bits of the black paper to show through.
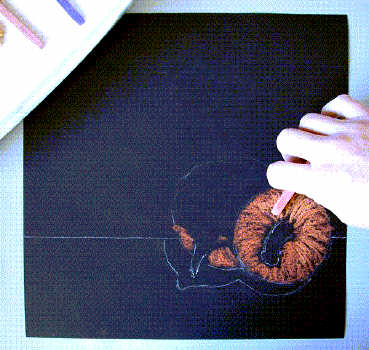
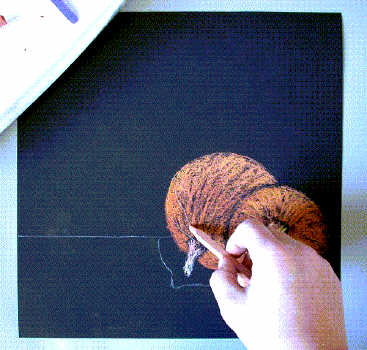
Here I begin working on the stem of the onion.
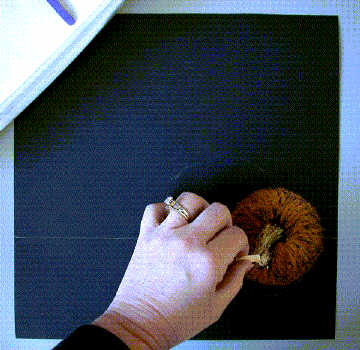
I start working the second onion in the same manner. Laying down a base color and then layering other colors over that.
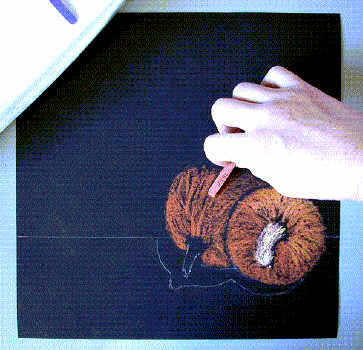
I've layered several colors on the body of the second onion and I begin working on the stem. You'll see that I sharpen some of my pastels to a point using an xacto knife. I like the sharp point for doing details.
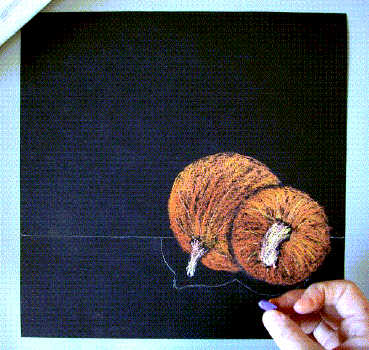
Next I'll add some detail lines to the onions to give them some character.
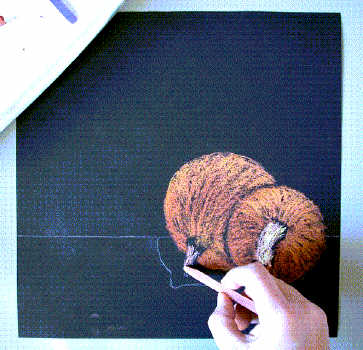
Now I'll start working on the foreground. I like the color purple next to the browns of the onions. I'm going to use the black color of the paper to represent the onion's shadows.
Using the side of the pastel I lay in broad strokes of color. However, this little piece isn't too easy to work with, so I'll switch over to a larger stick.
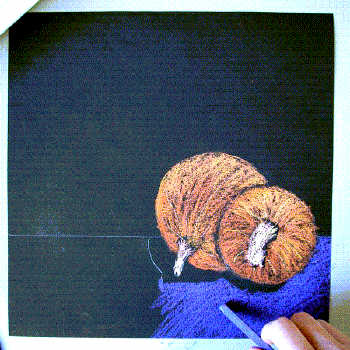
I work back and forth across the foreground until I achieve a saturation of color that I'm satisfied with.

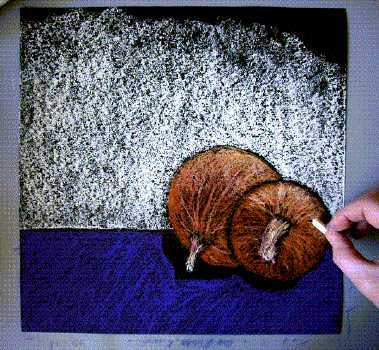
Now it's time to clean up a bit of stray pastel marks with my kneaded eraser. You really don't need to do any rubbing with the eraser, just press it down to the stray mark and lift it off.
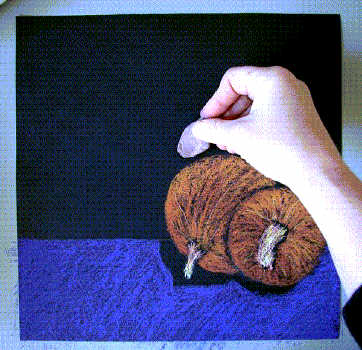
To finish up, I'm doing a simple background. I'd really like the onions to stand out, so I'll choose a light creamy color.
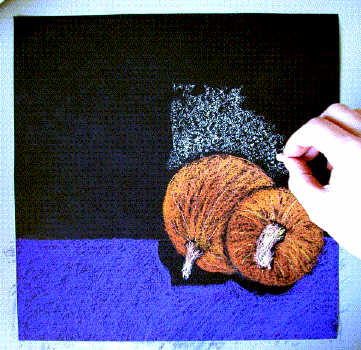
I use the same method as with the foreground, working back and forth across the paper until I have the intensity that I'm looking for.
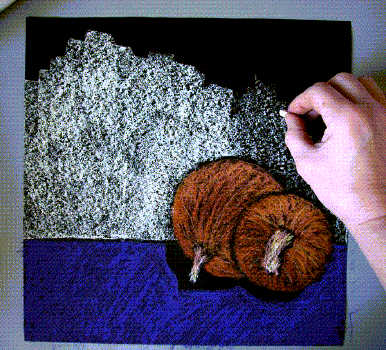
Time to review, am I happy with the painting, nope.
I think I'd like to strengthen the details and the highlights on the onions a bit.
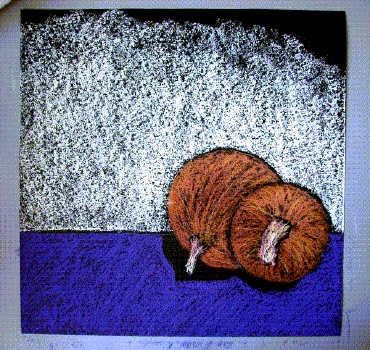
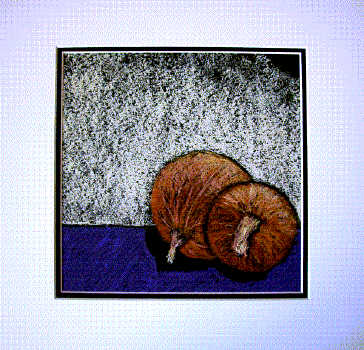
Here is the finished piece, with a mat. I've always enjoyed the look of woodblock prints and many of my pastel paintings, especially when using the black paper, remind me of that look.
And that's it!, a very simple pastel demo. Obviously there are many other techniques that you can use from broken color to feathering to scumbling, or watercolor, acrylic or gouache under paintings, and on and on. For those of you interested in pursuing this wonderful medium I would highly suggest some good books and lots of experimentation.


