- Home
- Education
- Drawing Painting Pastels
- Live Studio Knife Painting
I want to thank you all for joining me tonight and express my appreciation to ebsq for extending this opportunity to me! I hope you find the presentation informative!
I have found over the past 6 years or so since I first reached for a palette knife as my tool of choice to paint with that many seem to have a fear of the knife as an instrument.
I myself found the notion daunting when a painting instructor at my college first approached me with the idea to get me to loosen up in my painting (apparently I was an anal perfectionist with a brush!)
It was however, love at first swipe.
This Live Studio Presentation delves into the palette knife as a tool to translate your creative whims into works of art to free yourself from the confines of the brush and offer a new and exciting way to paint in oils. Best part? Easiest clean-up ever!
I wanted to also state before getting started as I am an extremely visual person there are quite a few images associated with this presentation -- over 20 actually. But I feel it is important to be able to see what is going on to grasp the technique fully.
I will be using a #20 Loew Cornell Steel painting knife with the dimensions 2-3/4" X 7/8", which can be found here -- http://www.dickblick.com/zz031/08/ .
I paint with Windsor-Newton Winton oils as well as Georgian oils (please see below).
It is easy to go through a lot of paint when painting with a palette knife and I have found the above mentioned brands cost effective without compromising on quality, which is important as a fine artist.
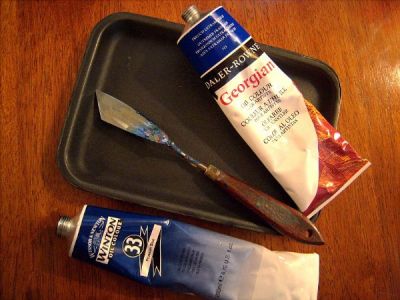
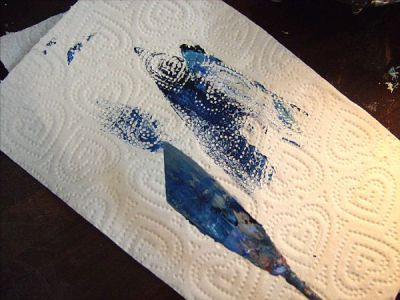
Notice in the photo I use discarded Styrofoam trays from cuts of meat.
I save them each time I cook meat and my sister and mother both save them for me as well. I have found these to be extremely useful for mixing paint. But of course, you can use any type of surface you wish for mixing paint. I have found pieces of glass/plexiglass to be extremely useful as well as they can be easily cleaned by wiping with paper towels afterwards.
I will not be going into acrylics during this session as I must confess I have not used acrylics in any capacity since 2002.
I prefer the buttery consistency of oil paint as well as the fact that oils dry much slower than acrylics. I utilize two techniques for paint application -- wet on wet and wet on dry. I am however partial to wet on wet as colors seem to flow together in a more unified manner. I will delve into both techniques for this demonstration.
To begin please have the above materials handy as well as a paintable surface (I will be using canvas for this demonstration but you can choose to use gessoed paper, masonite, or wood.) Please remember not to paint on paper with oils unless it has been primed with gesso. Oil seeps through unprimed paper and believe it or not can create a fire hazard!

You will notice in the image above there are no mediums, alkyds, or mineral spirits/terp represented.
I find undiluted colors to offer the most desirable consistency during application. I have used alkyds in the past which have sped drying time considerably, but they do thin the paints to a degree and I am drawn to the purity and rich intensity of undiluted pigments. Textural nuances are also easier translated with the knife without dilution of the paint in my opinion.
Now to get down to the nitty gritty ;)
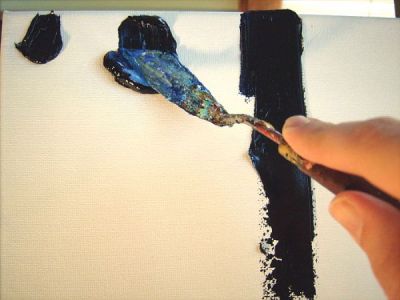
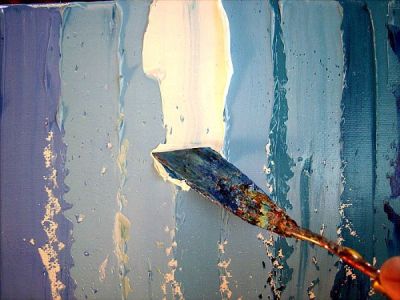
I have found that learning how to paint with a painting knife starts with knowing first how to handle the knife in one's hand. I have found grasping the knife and holding it sideways creates a more comfortable and natural movement when swiping the paint onto the canvas. This is demonstrated in the image below.
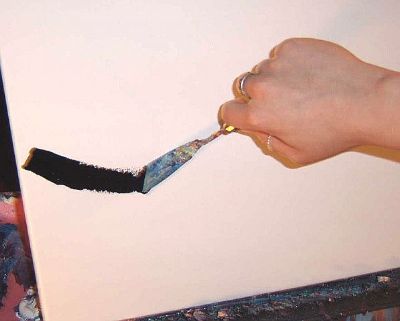
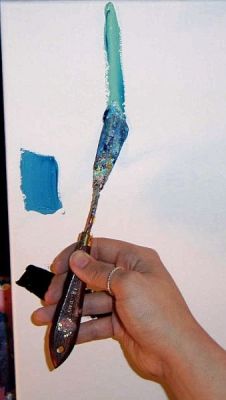
Holding the knife at different angles create different affects with the paint.
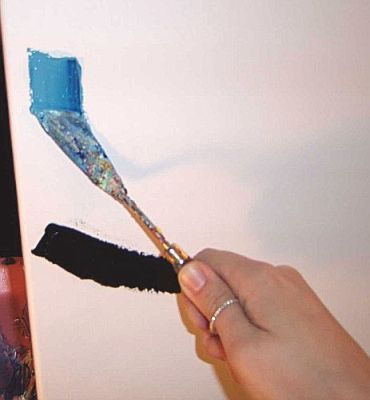
It is important when first starting out to feel comfortable holding the painting knife. The biggest thing I have found that stops people from being as free as they can with the knife is the amount of paint used. You need to be ready to, as my teacher once said, "waste paint". I took great offense to this when she said it to me as I felt it wasn't true. Every bit of paint on there contributes to the final product, even if you end up covering it up fully.
Some worry about the cost. You can get huge tubes of Winton paint for under 8 bucks online. Just gotta know where to shop (www.jerrysartarama.com particularly!)
Don't be afraid of the paint. I was told by an instructor to make a mess. Go wild. I was so afraid of leaving my comfort zone. But with palette knife painting you have to abandon that comfort zone entirely to embrace a new way of painting and move on from there. For your first time I recommend everyone make a muddy mess. Wait for it to dry, and make another muddy mess on top. Repeat until you start to realize no matter what you paint, you can paint over and it's ok. Trust me on this one!
So, to start the piece I created for this demonstration, I started with broad strokes of paint from the top down.
I work in different directions creating more depth....

Adding more colors as I go.
Utilizing different amounts of pressure you can paint one color on top of another without worrying about muddying it up or even mixing the colors....
There are times that I mix right on the canvas, and in the past that was exclusively how I did it. But I have come to realize the more variation in color the more visually stimulating the piece (at least in my own opinion.) So I mix paints on the aforementioned meat trays like so -

I keep working in this manner, mixing, applying in broad sweeps, diagonals, top to bottom, anything goes.

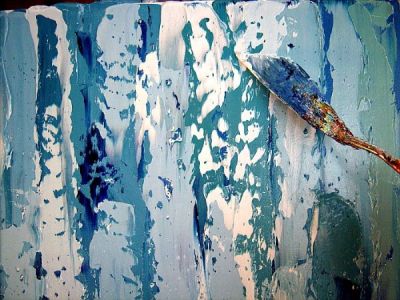
So here's the piece thus far -
It's important to have paper towels handy to wipe off excess paint as you work to ensure that, if you wish to have a "true" color that is uncontaminated by the color you had last used, you can simply wipe the knife clean and move on.
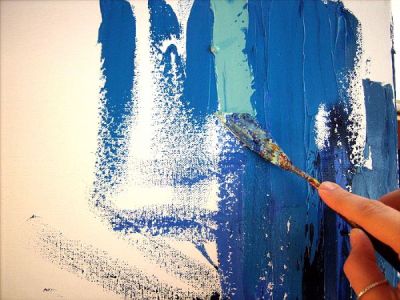
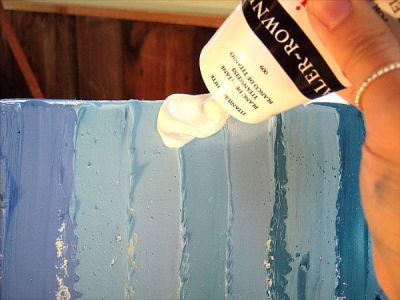
A lot of the time I like to saturate certain areas with paint. Sometimes I just grab the tube of paint and squeeze right onto the canvas...
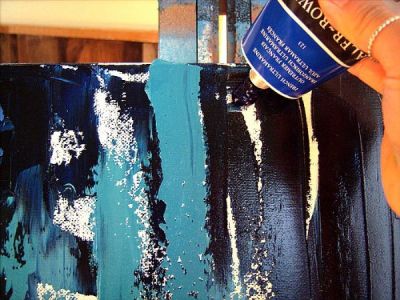
...and drag down through the paint with varying pressure so as not to mix the applied paint with the hue already on the canvas beneath.
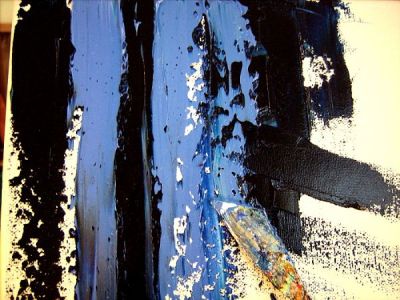
Here is an image of what the area illustrated above looks like as it works with the rest of the paint already on the canvas -

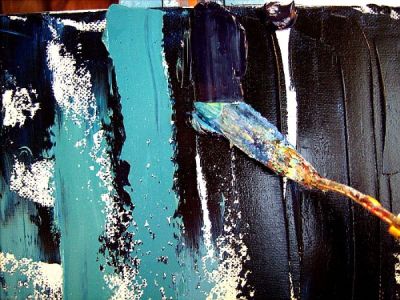
I continue this with white on top of the blue already there -
Notice as I drag the white down the canvas over the blue I have little contamination with the underlying blue hue -
Here is the area above -- notice the contrast and depth this method has created -
You can use light pressure and a swift motion of the knife to create interesting effects in the paint -
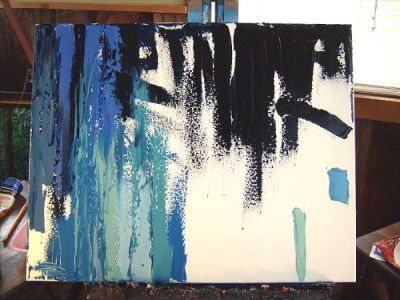
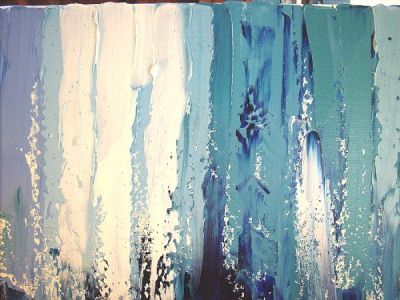
So now the background is complete -
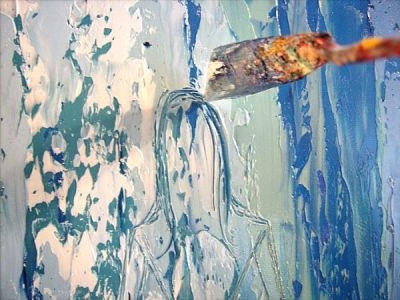
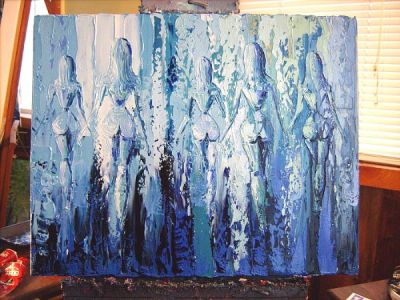
It is time to go in and paint my subject of choice, several female nudes.
You can "cut" into the wet paint with the knife like a pencil on paper creating an outline of your subject using the side edge of the knife -
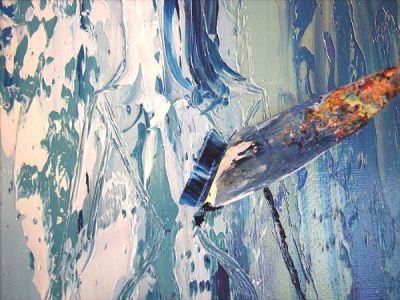
I then go back with more paint and work over and through the stencils I have created to "flesh out the figures" so to speak.
I utilize lights for highlights -
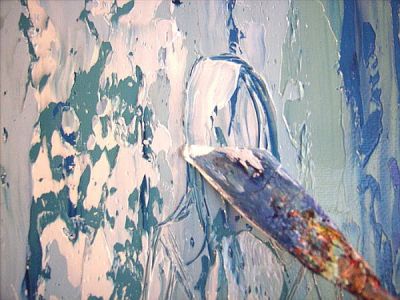
And darks for shadows -
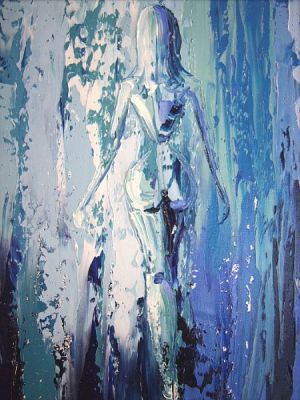
Here is a finished nude -
Always remember you can go back into the composition with more paint, more colors, more figures, more anything. You can get rid of parts by scraping the paint away or covering with more paint. It's really a very forgiving medium.
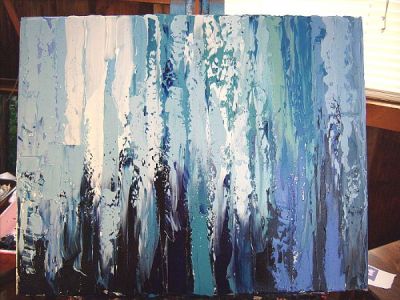
Here we have the finished piece.
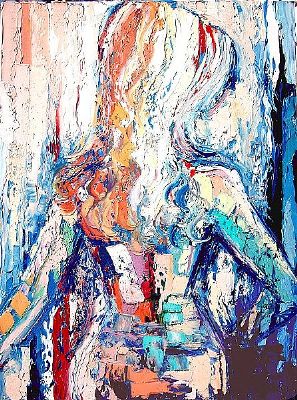
Now, if I wanted to I could wait for it to dry and "scummble" over top with more paint -- this is the wet on dry technique I mentioned at the beginning of the presentation. I have done this quite a bit and think you can achieve some striking results, especially when scummbling a complimentary color over another.
For example, you have a blue area and swipe some orange over top -- this creates a visual buzz.
Here are a few examples of finished pieces using this technique -

I think the toughest part about palette knife painting is knowing the paint and how it will react to another hue. All hues have their own unique composition and consistency. Each has its own unique property. Alizarin Crimson and Phtalo Blue for example are "stains" that are more buttery than say, a Naples Yellow or a Terre Verte which are extremely dense pigments.
If one tries to use the wet on wet technique and put Terre Verte green over top of Alizarin Crimson more than likely the green will end up sticking to the knife and will pick up the crimson with it, leaving an unsightly streak where you wanted green to be.
Titanium White is a lot thicker than Zinc White. Even though they are both white they will do different things (and create different hues) when mixed with say, Cerulean Blue.
It's good to experiment ~a lot~ and get to know the paint. But you know, that's the fun of it! And as I said before, when finished, you just put the caps back on your paint, toss the old meat trays (or, if they still have a lot of paint on them put them in the freezer -- little trick to make the paint last longer!) and wipe off your knife and you're good to go!
I hope this presentation has given you the courage and knowledge to dive on into palette knife painting! If it has you should get to painting and enter your creation into June's palette knife show right here at ebsq!


