- Home
- Education
- Mixed Media and Collage
- Live Studio Found Object Jewelry
Live Studio- Making Jewelry from Found Objects
Amethyst Lobster
Mixed Media and Collage
Introduction
First, I would like to thank EBSQ for asking me to do a chat. I've been so inspired by this community and am so pleased to be able to contribute something back to it. It's REALLY my pleasure to do this!
Found Object Jewelry
I believe that there is something primordial about adorning ourselves with found objects. I enjoy the challenge of finding objects that are common and elevating them into a piece of adornment. If you take up the challenge, you'll find yourself redefining what is of value and re-looking at just about everything!
Finding the Objects
Number one step in creating jewelry from found objects is to go and find objects! Seems obvious, but it's probably the step that trips most people up. SO.. I'm going to make it easy for you.
Step 1. Have a Party!
If that's too hard, then at least order take-out. You can do that, right?
You need the following for a necklace and earrings set.
- 1 or 2 liquid refreshments in canned form
- 1 or 2 thin plastic lids normally found on Chinese food, salad bars, supermarket bakery containers, etc. You'll want the thinnest plastic lid you can find, yet are still stiff.
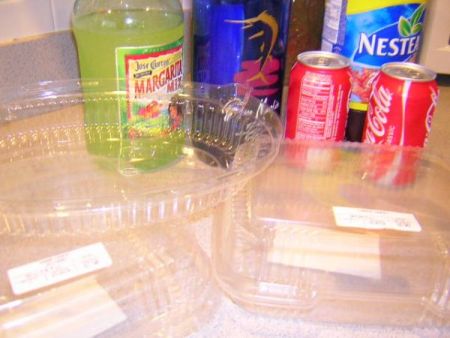
Here is a picture of a few party leftovers. Note the plastic in the foreground. Disregard those big bottles in the back - those are for another day!
Repurposing the Objects
We are going to use the plastic lids as a shrinky dink type material and make pendants or charms with it. We'll use the soda or beer cans to make tube shaped beads. Then, we'll put them together into a simple necklace and earrings set.
Take-Out Charms
Supplies Needed
- 1 or 2 thin plastic lids mentioned above
- loose-leaf size hole punch
- ink - (sharpie, paint pens for glass,)
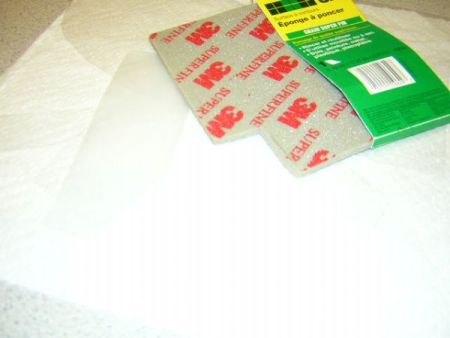
- sandpaper - super fine
- oven
- scissors
- (optional) rubber stamps and stamp pad - permanent ink preferable)

- Clean the lids and plastic containers with hot sudsy water. Take off labels and glue. I leave stubborn labels on and just cut around them (no need to sweat).
- Your aim is to obtain flat, smooth pieces of acetate plastic, similar to what you buy as shrinky dinks. This is called no.6, but it's rarely marked. Cut the ridged edges off the lids. You should have several large pieces of flat plastic.
- Sand each side of these pieces. I use a super fine sandpaper.The sanding can be skipped if you have permanent inks. The sanding helps the ink to set, so you don't need a varnish.
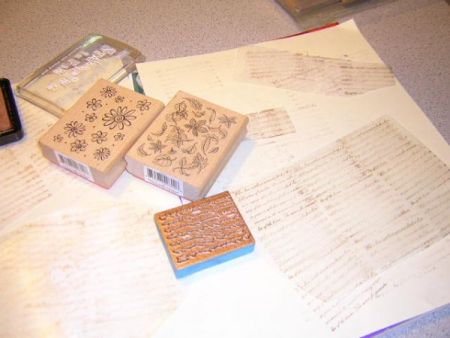
- Draw or stamp images. Choose some favorite stamps and inks and start
stamping on the plastic. Fine artists may choose to draw instead of
stamping. One thing to keep in mind is there will be significant
shrinkage. This is cool because it shows detail on the smallest scale.
But keep in mind the charms may shrink 3 or 4 times smaller. I cover the
entire surface with stamping. Let dry a bit so they don't smudge. Add a
few squiggles of paint pens.
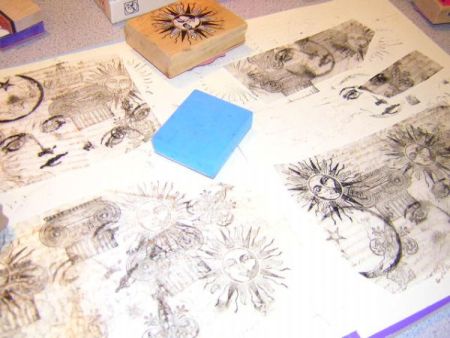
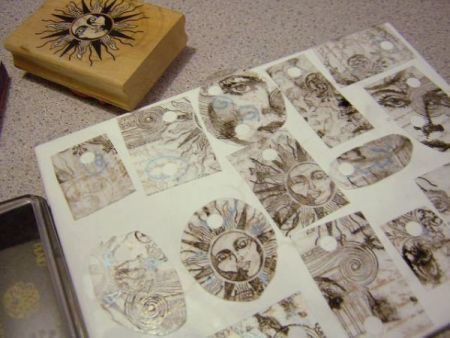
I like to layer my stampings with the first layer in a soft color, like gold with an indistinct pattern like script. then add a layer of black ink with more recognizable images. The images show through on both sides with the clear plastic, so you only need to do one side. Let dry a bit.
Here's a picture of first layer of stamping
The plastic covered in images
- Cut shapes for pendants and charms. Squares and rectangles work well. Cut round holes with a paper punch. I use a 3 hole loose leaf punch. These will shrink to a perfect size for most jewelry. The plastic may shrink 4 times smaller, so don't cut the shapes too small.
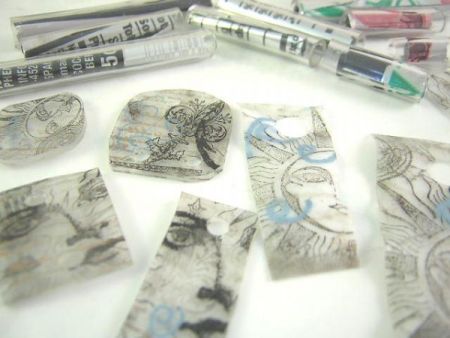
- Bake for 4-6 minutes at 325 Fahrenheit. Watch the charms curl up and then flatten out. When they flatten, they are done. Remove and immediately press down with a rubber stamp or blotter to help flatten more. Sometimes a few just don't uncurl. The no.6 plastic shrinks and thickens to about 1/8 inch. Plastic that is slightly thicker than no.6 doesn't shrink much. It gets white and wavy, but not thick. The lids are rarely marked, so expect the unexpected! After a while, you'll get a good sense of which type of lids you want.
- Let cool. Wait 24 hours and check if the ink rubs off. Sand edges if needed. Use a paint pen to color edges, if desired.
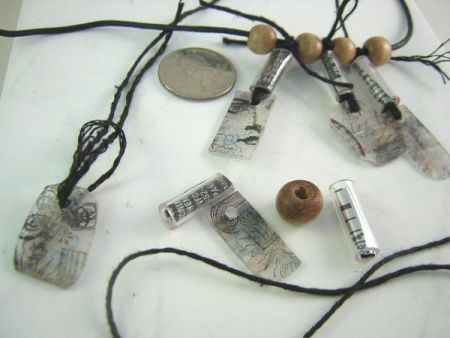
Here are the finished, baked charms. The soda beads in the background are what we will make next.
Soda Beads (or Beer Beads depending on the beverage)
This is NOT hard to do! You will be amazed at just how easy it is to deconstruct a can. Cans today are paper thin, this is not your father's tin can! Try it!
Supplies
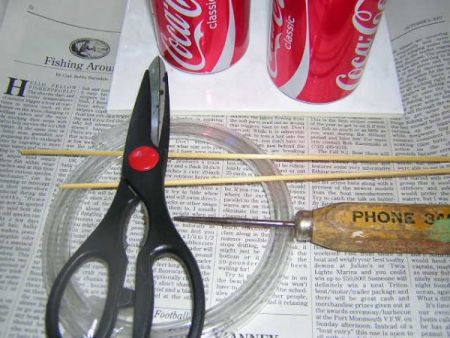
- 1 or 2 empty aluminum cans
- Bamboo skewer
- Awl or Ice Pick (pointy object)
- 1 ft Plastic tubing 1/4" (found in hardware stores, get the smallest size)
- sharp household scissors
- safety or regular glasses
- thin gloves
- Wash the can with hot sudsy water. Let dry.
- Gather supplies in a place where it's okay if little shards of aluminum fly around. An open trash can nearby is a good idea. Newspaper spread out is good too.
- Put on the glasses and gloves.
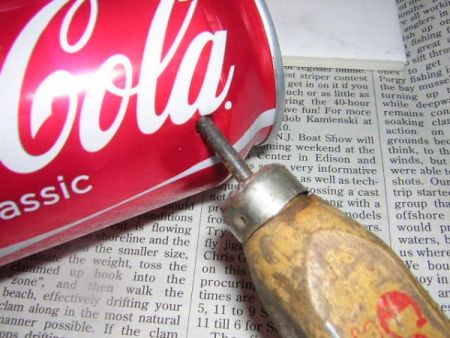
- Punch a hole into the side of the can, near the top or bottom, on outside edge. See how thin it is? Twist a bit to expand the hole.
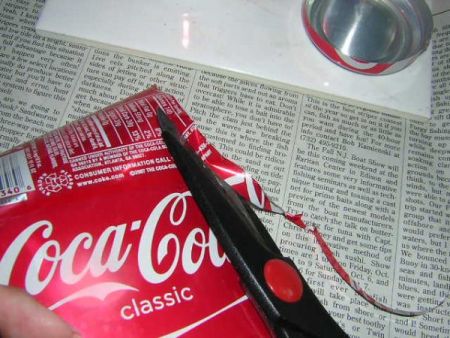
- Push the tip of the scissors into the starter hole and cut along a seam and cut the top and bottom off.
You should have a rectangle of pretty aluminum. Trim the rough edges.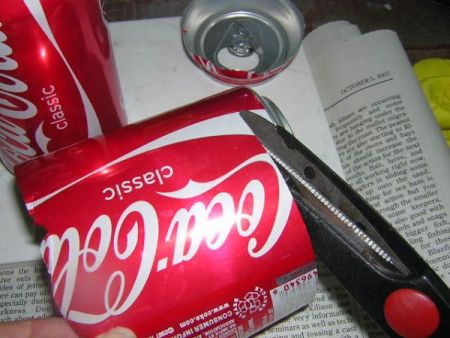
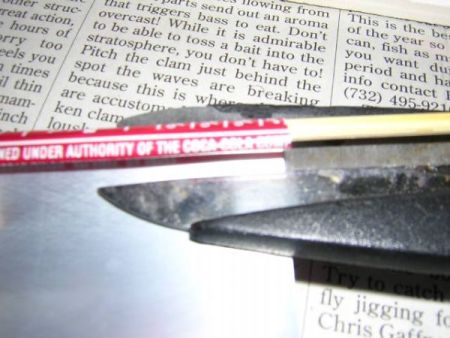
- Roll the can sheet around the bamboo skewer, for just one layer. Cut the can so it slightly overlaps on the skewer. The aluminum will retain it's shape. Press it well with your fingers until it is a tube.
- Push the wrapped skewer into the plastic tubing. Note the length of these are up to you. I make the beads as long as I can and then later cut them into smaller sizes as needed. You can cut the length to make it easier to work with now. You'll have to twist and push a bit to get the skewer into the tube. It won't go all the way.
- Pull the skewer out and the aluminum should still be in the plastic. Cut the plastic to any size. After cutting, re-enfore the holes by twisting the skewer in and out.

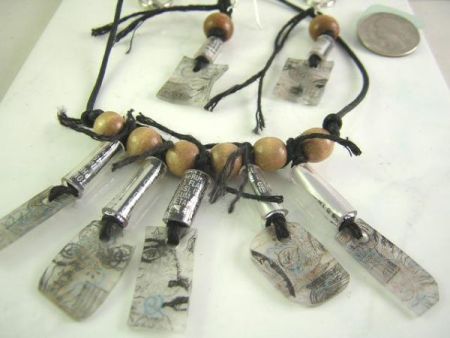
Take Out Charms and Soda Beads Necklace and Earrings Set
Supplies
- Take-out charms
- Soda Beads
- 1mm Leather Lacing - 16-24 inches
- Hemp or macrame cording
- 2 foldover crimps
- 2 jump rings or split rings - small 6mm
- 2 split rings 14mm
- 1 lanyard clasp
- a handful of large holed beads
- 2 earring wires
- scissors
- flat nose pliers

- Layout your beads and charms to your design.
- Cut the leather or suede lace to your length, allowing an inch or more for your clasps.
- Cut 4 inches of hemp for each charm.
- Fold the hemp in half and thread through hole in charm. Pull the two strands through and tighten.
- String a soda bead above the charm. Tie an overhand knot. Tie onto the leather necklace next to the wood bead. Tie again (double knot).
- Repeat until all the beads are strung.
- Push all the beads into the center of the leather. Tie an overhand knot on each side, to keep the beads centered.
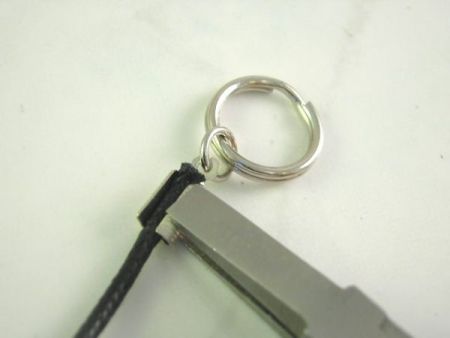
- Attach jump ring and split ring to foldover crimps.
- Lay the leather onto the foldover crimp. Using flat nose pliers, push one side of the crimp down onto leather. Fold the other side down on top of the first side. Press tight with the pliers.
- Add the lanyard clip.
- String two charms and beads as you did for the necklace.
- Tie each onto an earring finding.
- Trim the hemp, if needed.
Thank you for your interest in creating found object jewelry!
Mother Earth thanks you for recycling!


