
Hi everyone!
I hope you enjoy my Live on "Dyeing Yarn with Kool Aid in 16 easy steps!" I thought it was only going to be like 6 steps...but after writing it all out it was 16. It's not technical at all though, I just probably went overboard in explaining it. (as I usually do with stuff)
P.S. I will be giving you links at the end to some specific places where you can buy the supplies I'll be talking about.
Let us start, shall we?
One day when I was surfing on ETSY, I saw a gal was selling the most gorgeous colored yarn. I read her listings and saw that she dyed the yarn herself using Kool Aid. I was enthralled with how simple it sounded and wanted to learn more about it.
I read up on dyeing on the Internet and watched as many YouTube Videos I could find on the subject. One day I decided to stop being a reader and start being a dyer!
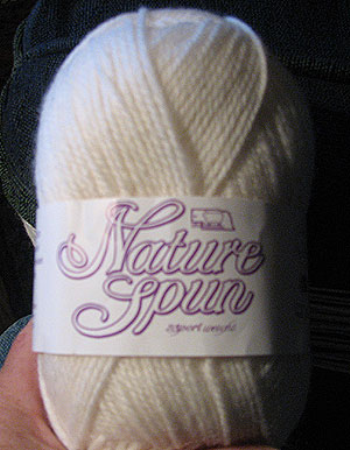
The first question I had was where to buy the undyed yarn. I decided to go to my local craft store. I had read that the yarn had to be an animal fiber (like wool) so that's what I searched for.
Anywhoo...I decided just to go to a yarn store and see if I could find some inexpensive wool yarn I could practice on. I ended up purchasing 3 balls of yarn that cost $3.65ea. perfect :)
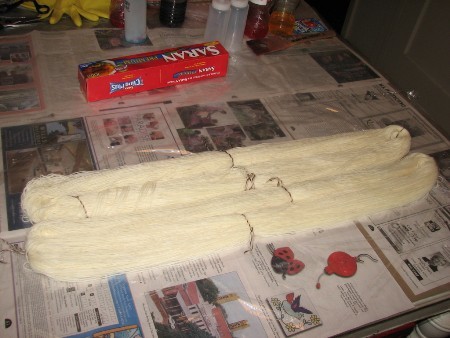
When I got home, I had to unwind it and get it into what they call a "skein or a hank" of yarn. All that means is A BIG LOOP.
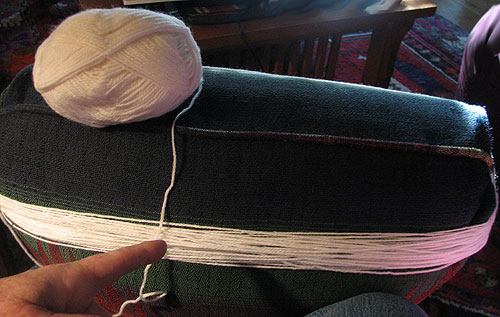
I used one of my couch cushions and wrapped the yarn around it to make a skein of yarn. If you have a "Yarn Swift" you can use that. (It'd sure be a lot easier!)

So after getting it in it's loop shape, I tied it in about 4 places with little bits of the same yarn. You do this so the yarn doesn't get all tangled up as you are dyeing it.
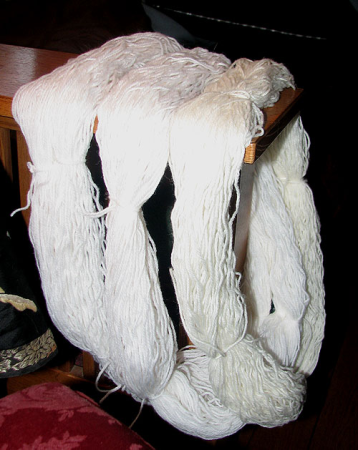
Ok now you are set with your undyed "blank canvas" yarn.
Here's what you'll need:
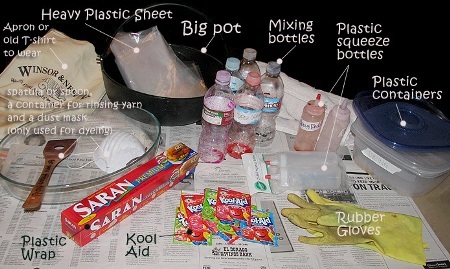
1.) A big pot (not cast iron) Mine is cast iron but it's glazed inside with enamel.
2.) Empty jars or bottles for mixing your Kool Aid dyes. (I use recycled water bottles)
3.) Kool Aid. They old fashioned package type--It's very important that it's the NO SUGAR ADDED variety.
4.) Plastic squeeze bottles with a pointy tip.
5.) Rubber gloves
6.) A dust mask ((yes, you need it))
7.) Plastic wrap--any type
8.) Paper towels and some old bath towels you don't care about. (which I forgot to include in the picture)
9.) Wear some clothes that you don't care about getting stained.
10.) A sheet of heavy duty plastic to cover your work space (you can also use a big hefty bag or an old plastic tablecloth)
11.) Plastic containers (microwave safe) I just buy those 8" x 8" plastic containers from the grocery store that are for leftovers. You get 4 in a pack.
12.) A microwave.
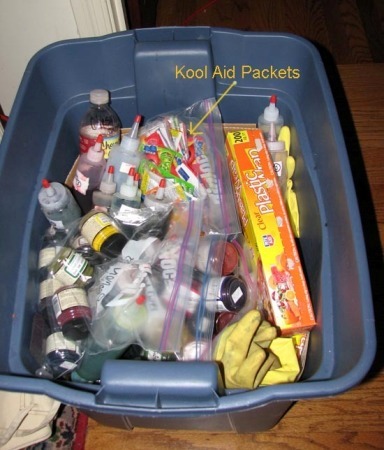
I keep all of my STUFF in a big tote, and as you can see it's not neat! I set up my work space on my old dining room table since I only need about a 30" x 40" inch area to work.
Steps:
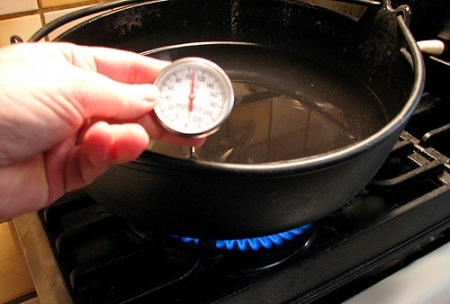
1.) Fill up your pot about 3/4 full with water. Heat the water up until it reaches 120 degrees. No hotter! Check it with a thermometer.
2.) Add the yarn to the hot water (I do 2 at a time) and use the spatula to push it into the water so it gets totally submerged. Don't be too rough---you don't want it to get all tangled. Just poke it down with the spatula until all the dry yarn is covered with the water.
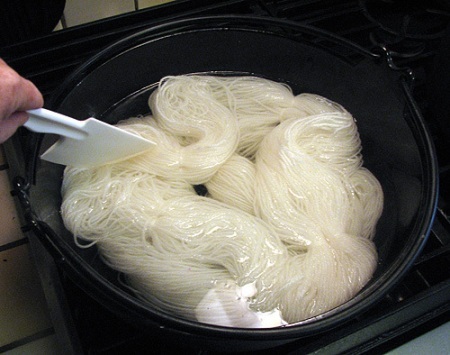
Let it soak for 20 mins. or more....and while its soaking, prepare your work surface
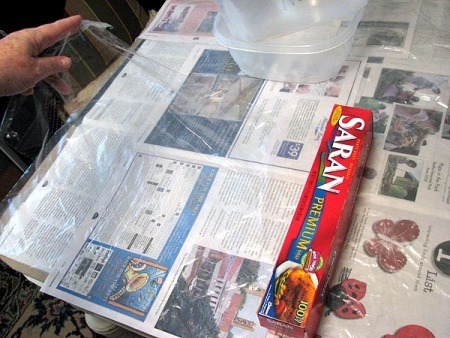
3.) Lay down the heavy duty plastic or a hefty bag, and then a couple sheets of plastic wrap on top of that. You'll need two long sheets. Overlap the edges on one of the long sides so you get one big sheet.
Now you need to mix up your Kool Aid.
4.) While wearing the dust mask, take one of the recycled water bottles and add 1 or 2 packets of Kool Aid to it. Then add regular HOT tap water to the bottle about half way. Put the lid on the bottle and shake it up so all the Kool Aid dissolves. Fill the bottle up to the top with more hot tap water. The measurements are not critical.

5.) Pour your dyes into the plastic squeeze bottles by using a funnel, or do like I do and and just pour it in carefully.
6.) After your yarn has been soaking for 20 mins. remove it from the water, letting as much water drain off as you can and then transfer it to a plastic container. I use the back of my spatula to press out more water. If you are wearing your rubber gloves you can also squeeze more water out of the yarn (Do not twist or ring out) and also be careful because the yarn is still hot!
7.) Go over to your work surface and remove the skeins of yarn carefully by picking it up at one of the "ties" you made and shake it a little to loosen up the strands so they get all straight and neat before you lay it down onto your plastic wrap. I make sure the skeins are neat and as flat as I can get them. Try to even spread out the strands so the the dye gets to the underneath ones.
Now comes the fun part! You just squeeze out the Kool Aid dye colors anyway you want. You can smoosh the yarn down a little (wearing your rubber gloves) to get the dyes to blend into the next color a little better. Experiment with color...but remember too many colors will give you a MUDDY mess. It still might be pretty though, if you like browns.
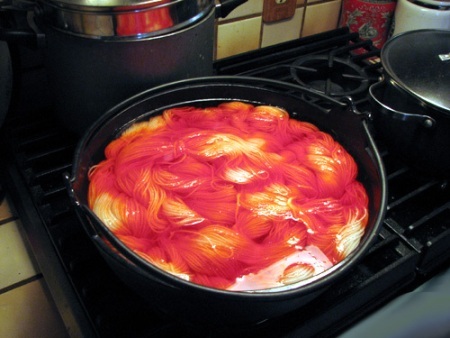
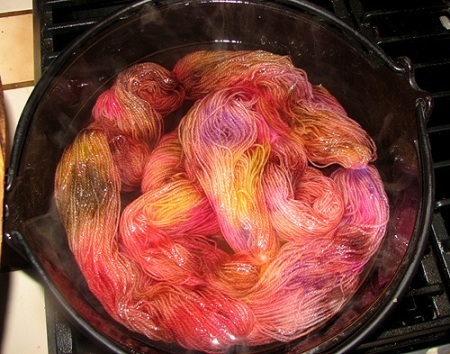
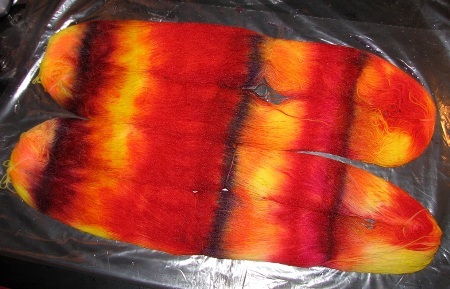
You can also add the Kool Aid to the soaking pot like I did here. I added two packages of "Tropical Punch" Kool Aid. It's a super-duper orangie red color.
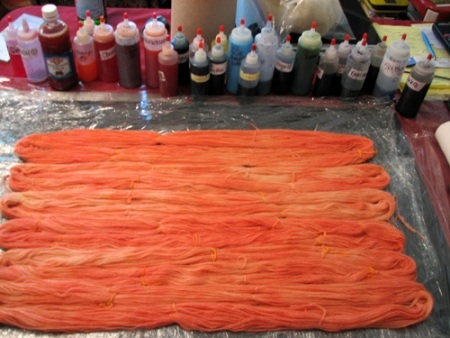
Here are the skeins all lined up like little soldiers on my plastic sheet.
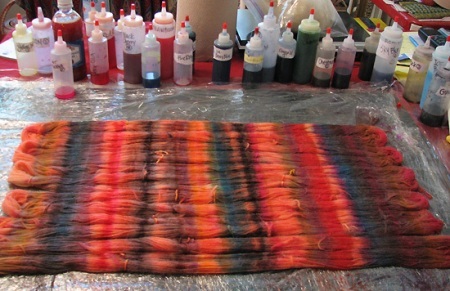
Then I went crazy with adding stripes of colors.
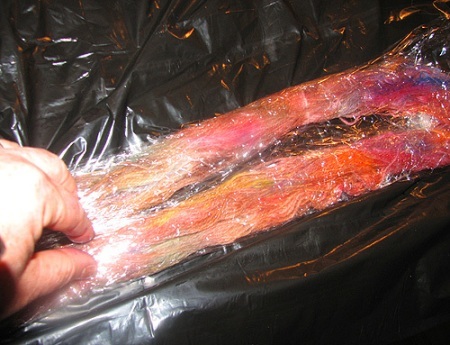
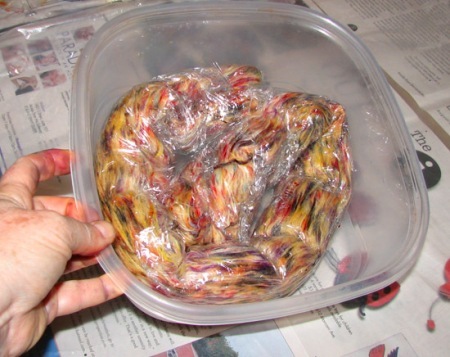
8.) When you are done, soak up any puddles of dye on the plastic with some paper towel and starting with the ends, fold over the plastic and roll up the yarn into a long tube shape then coil it to fit into your plastic container. (I know I am jumping around showing you different yarn in each picture, but hopefully you are getting the steps?)
9.) Pop it in your microwave (covered lightly) for 2 minutes on HIGH.
10.) After the 2 mins. check on it to see if there's any color dye floating around in the bottom of the container. If there is, zap it a minute longer.
11.) Remove the container and dump the "steamin' weenie of yarn" onto your old clean towel. I keep a towel on my pulled out silverware drawer, which is conveniently located next to the sink. Let it cool before you unwrap it!!! ((this is the hardest step for me, to wait))
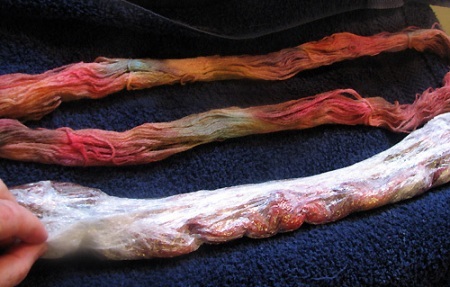
12.) Remove the plastic wrap and throw it away. If the plastic has kinda melted or fused together too much to find a loose end, you can use scissors, but be really careful you don't cut the yarn!
13.) In your sink, fill up a container with warm water. I use a glass casserole dish. It should be the same temperature (to the touch) that your yarn is. You don't want to add the warm yarn to cold water or it will shock the fibers too much and it will FELT TOGETHER.
14.) I add a cap full of "Kookaburra Wool Wash Soap" (available online or at knitting shops) The 16oz. container costs about $10.00. It has Tea Tree oil in it which acts as a natural moth deterrent and smells really good. Another good soap for wool is "Euculan." Like I said, I will link to these soaps at the end of my presentation.
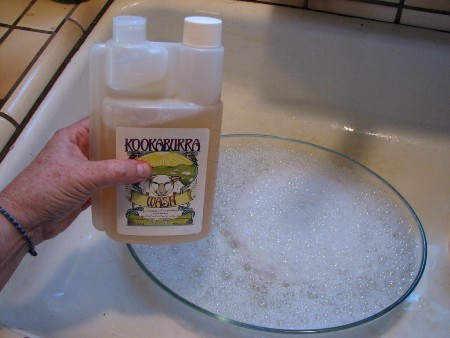

15.) Carefully swish your yarn in the soapy water for a few minutes and gently squeeze out the water. You don't have to rinse the soap out too much. It's better if you don't. The water should be clear, like this.
![]()
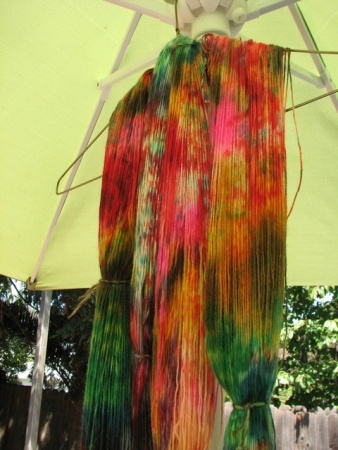
16.) Blot the yarn in another towel then hang the skein on a hanger and place outside (not in direct sun) and let dry. Or you can hang it in your shower.
TIP: I have also applied squirts of dye directly to the yarn with a eye dropper while it was still in the dye pot. Experiment- it's fun!
a few more colors were added....
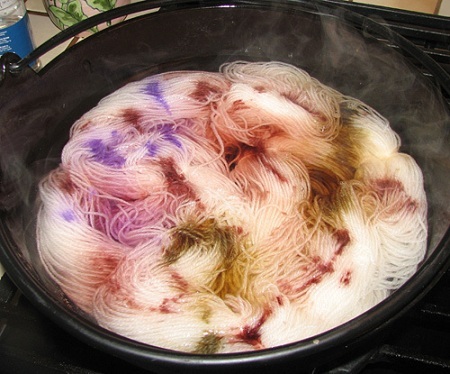
Here I just poured some Blue Kool Aid and some Pink in the pot and just let it sit for a few minutes.
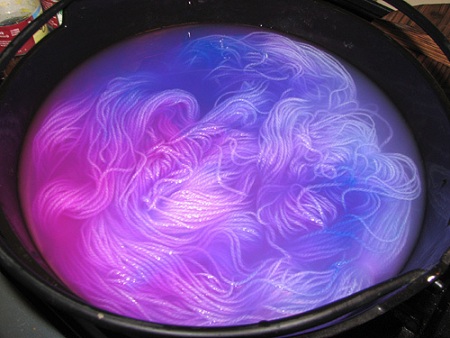
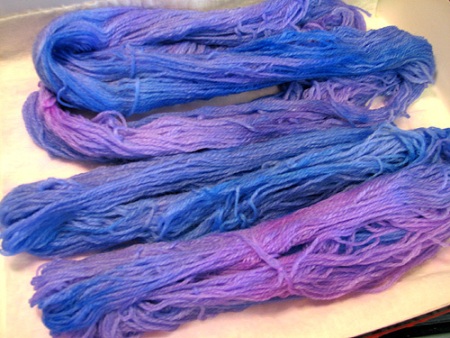
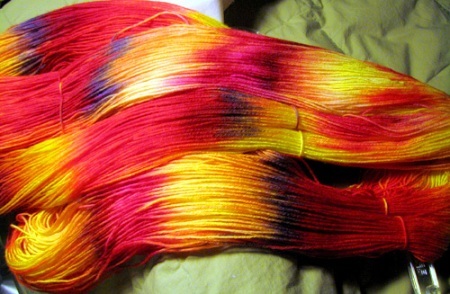
Here's how wicked it came out.

Then here's another dyeing session. I thought the colors looked kinda funky, but they actually turned out really great!
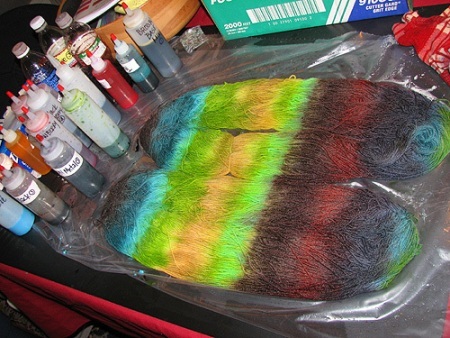
Here's what they came out like.
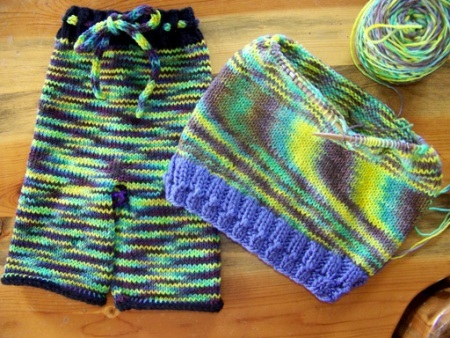
That yarn sold to a gal and she sent me a progress of a couple little outfits she was making for twin baby boys.
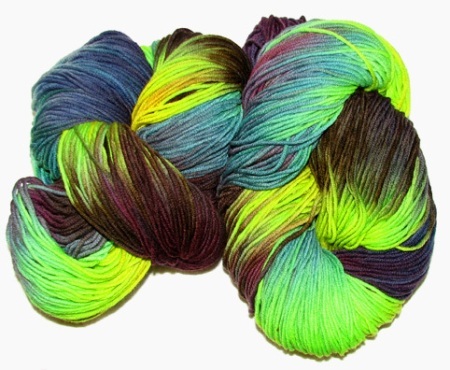
One more picture of another dyeing session.
and here's how it came out.

So....that was just a sampling of how your yarn looks wet with dyes and how when it dries or is knitted up can totally change.
After your yarn is completely dry you can wind it in a ball using a ball winder or (your trusty couch cushion again) and your ready to knit or crochet or use the yarn how ever you'd like. If you've washed the yarn thoroughly after dyeing it, you don't have to worry about the colors bleeding in the wash. Some fading may occur over time, particularly if they are exposed to a lot of sunlight. Though the fruity Kool Aid smell will fade, the bright colors will last for a long time!
Your kids can help you with "Kool Aid" dyeing without any worry because it's non-toxic.
One final picture of my recently dyed yarn with Kool Aid (and Jacquard Acid Dyes)
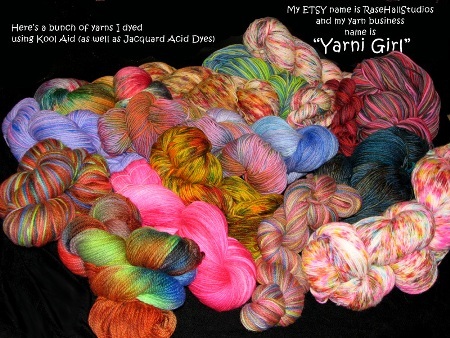
So...if you liked dyeing with Kool Aid, you can look into dyeing with Jacquard Acid Dyes too! You can combine the Kool Aid dyes and Jacquard Acid dyes. (just not in the same bottle) AND! unlike Kool Aid, if you decide to use Acid dyes, it's not kid safe anymore. You CANNOT reuse your vessels or spatula etc. for regular food anymore.
Here are the LINKS I promised:
"Bare" Undyed yarn:
http://www.knitpicks.com/dye+your+own+knitting+yarn_YL300110.html?intmedid=CatHomeSubAd:Dye%20Your%20Own%20Knitting%20Yarn:300110
http://www.wool2dyefor.com/
http://www.paradisefibers.com
http://www.dharmatradingco.com
Link to Wool Wash Soaps:
http://www.amazon.com/s/?ie=UTF8&keywords=eucalan+wool+wash&tag=googhydr-20&index=aps&hvadid=2343413901&ref=pd_sl_9nvl64nk1_e
Jacquard Aid Dyes:
http://www.jacquardproducts.com/products/dyes/aciddye/
Thank you for having me demo this EBSQ!
Lori Rase Hall


