As an artist, illustrator, and designer garnering most of my work from one end of the fashion industry or another, I've often thought about launching my own line of apparel. The issues arose when I started to see exactly how much waste is involved in the various processes and on the production line itself.
As if my own experience wasn't enough, this report from the EPA, further fueled my interest in creating a line of sustainable fashions that would not only benefit the environment but help others as well. To this end, I began Skirting the Issue, a unique line of custom-fitted, hand painted and embellished skirts, recycled, repurposed, and refashioned from cast-off t-shirts and vintage fabrics. With this goal in mind, I'd like to share a very basic recipe that will help you to design your own, custom-fitted skirt from any of your favorite tees.
Before you begin, it's very helpful to gather your tools, ideas and information.
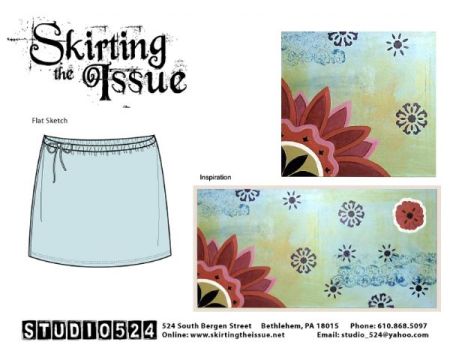
I like to start with a sketch of my design which I've tailored to suit my body type. Since we're all, most likely, of different shapes and sizes I decided to work on a 16â a-lined skirt, drawstring skirt. This skirt is flattering to most figures, of a sensible length, and the drawstring style will make it very easy to wear and ensure a good fit with or without a belt.
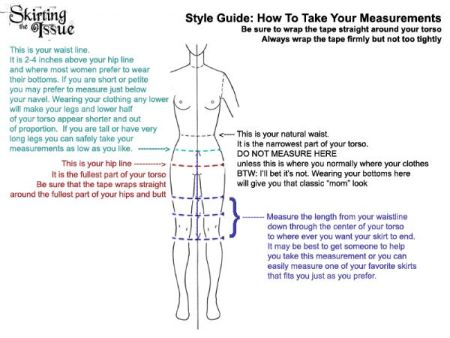
It's also helpful to have your measurements handy. If you're not sure how to take your measurements, I have a handy guide that will help you.
Additionally you'll need:
- 1 or 2 t-shirts (L or XL)
- Iron and Ironing Board
- Scissors or Rotary Cutter
- Cardboard or Cutting Mat
- Straight Edge
- Measuring Tape
- Pencil or tailors' chalk
- Straight pins
- Hand needles or sewing machine and coordinating thread
- Laundry markers, fabric paint
- Brushes
- Articles for embellishment

If your t-shirt is badly wrinkled, you'll want to iron it first. It makes cutting cleaner and a lot easier.
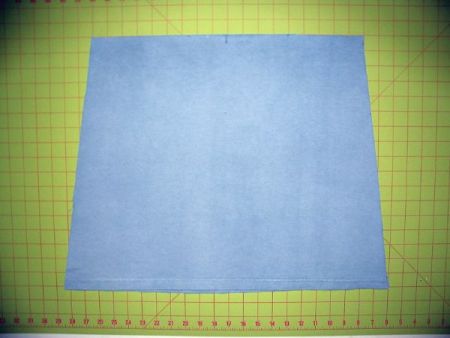
Lay your t-shirt flat on your cutting surface and measure 17" up from the hem of the t-shirt and mark it at regular intervals.
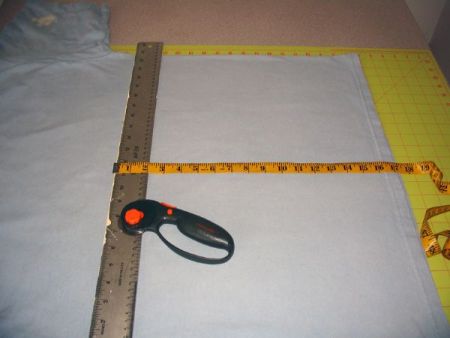
Using your scissors or rotary cutting tool, cut across the body of the shirt using the guides you just marked. You now have a 17" tube and you can save the upper part of the t-shirt for another project.
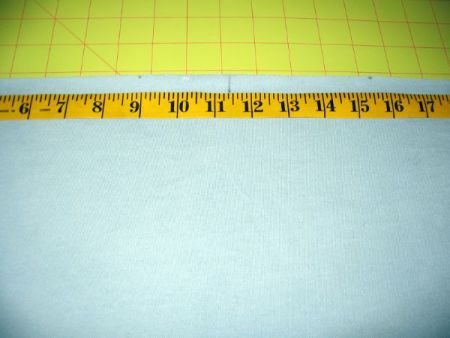
Mark the center across the width of the entire tube. The original hem of the shirt should be at the bottom.
Divide your high hip measurement by 2 and center this measurement on the center point of the tube.
Mark from the end of the tape to your measurement.
Measure 5" down and mark the center of the tube again.
Divide your hip measurement by 2 and center this measurement on the center point of the tube.
Mark from the end of the tape to your measurement.
Position the straight-edge at an angle, connecting one set of the marks that you made for your measurements and cut along this angle to the bottom of the tube.
Do this again on the other side.
Turn your fabric, right side to right side, and pin along the side seams.
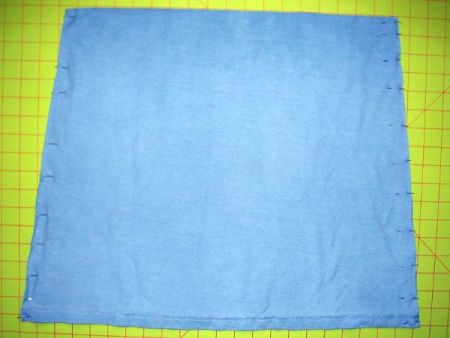
If you're using a sewing machine you will want to make sure your pins are inserted perpendicular to the seam.
Stitch both side seams and remove the pins.
You should now have a trapezoidal shaped tube, open at the top and bottom.
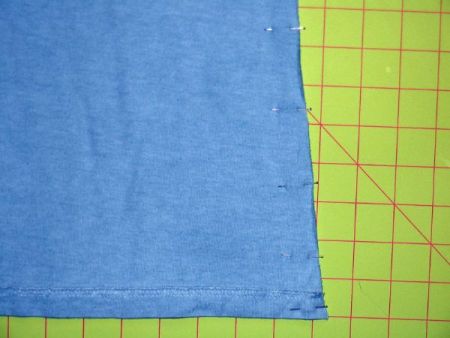
Turn 1" down from the top of the skirt and pin to secure. This will form the casing for the drawstring.

Stitch the casing down around the entire circumference of the skirt.
Remove the pins.
Return to the top part of the shirt that you previously set aside and cut a one inch tube from the bottom.
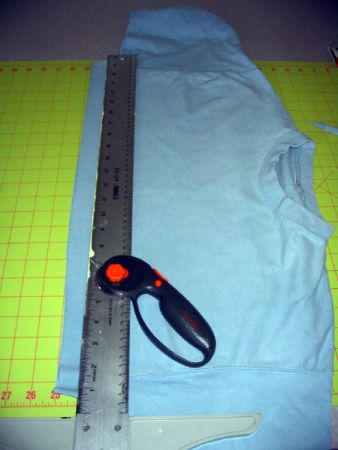
Open one end of the tube that you just cut. Stretch the fabric to force it to roll and knot the ends.
This will be the drawstring for your skirt.
Try your skirt on and mark where you would like the drawstring to open.
I prefer it to open slightly off to the left side but you may like it as a center tie.
Snip down, about 3/4 of an inch into the waist band/casing that you just finished sewing.
Be very careful not to cut too deep because you do not want to cut the stitches that form the casing.
Thread the drawstring into the casing.
Try your skirt on and tie it at the waist.
Now you're ready to embellish your skirt with your own unique artwork or other collected artifacts.
If you're painting your skirt or drawing with markers, remember to place a piece of cardboard between the layers of the skirt so your work will not bleed through to the other side.

Additional examples of some interesting adornment procedures and processes are right here on EBSQ:
Transformer Jeans Skirt
Image Transfer Techniques
I hope that you find this information interesting and helpful in designing your own style of skirts from recycled tees.


