- Home
- Education
- Photography and Digital Art
- Pinhole Photography
You may have heard of pinhole photography, but what is it? You know it is a form of photography, but what is it exactly? Simply put, pinhole photography is a unique method of taking pictures, with a camera that has no lens.
It is not a new art form, but it has recently gone through a renewed popularity. This renewed interest is due in part to the backlash to the onslaught of digital photography and art forms. As with digital photography, a pinhole camera can help bring your creativity alive. But with pinhole photography you can design and build the camera itself, creating an element of control that gives it a unique twist. Once the basic concept of a pinhole is understood, and you are able to create a workable camera and entire new world of possibilities are opened. And your only real limitation is your own imagination.
If you have never tried pinhole photography and would like to know what it is, or if you have and would like to know more about the process, this article is written with you in mind.
History and Examples:
The exact date for the beginning of pinhole photography is one that is difficult to pinpoint. But there is some evidence that the process began with the Greeks as they seem to have been aware of the concept behind photography in general.
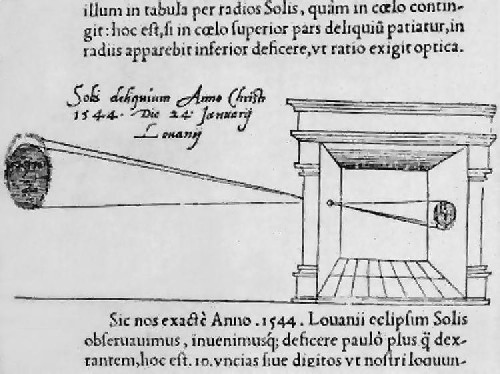
This principle behind pinhole photography lies behind the use of camera obscura. To see this phenomenon go into a dark room, make a small hole of some sort into the wall. Now before your family bans you from the power tools, by 'hole' I am referring to making a hole in a light shade covering a window. If to much light comes through the sides of the shade, simply tape it down with a removable tape. If you place a piece of paper approximately one foot from the small hole you will see an image of the world outside the window. The first thing you will notice when you look at the image is that it is upside down. You may recall from your High School Biology lessons that the same thing happens inside the human eye.
|
| 1544 Engraving showing Camera Obscura |
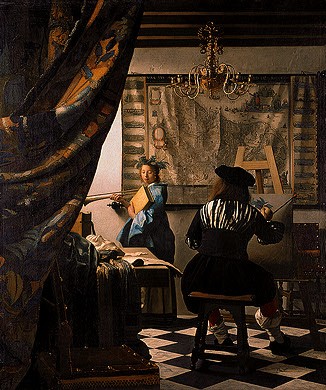
This same process was used by many artists in the seventeenth century. The artist Vermeer is said to have relied on the process of camera obscura, to create his masterpieces.
|
|
Johannes Vermeer The Art of Painting, c. 1666, oil on canvas Kunsthistorisches Museum, Vienna |
But camera obscura alone is a fleeting occurrence, unless it is captured on a light sensitive surface. The desire to capture an image in a permanent fashion, brought about the discovery of a light sensitive emulsion. Traditional films and photography papers are all made light sensitive with a thin layer of emulsion. Originally they placed a thin layer of the emulsion on a metal plate, this enabled them to preserved the image created with the camera obscura for future viewing. But the emulsions were not at the same level of sensitivity that we use today in our films and photo papers. And it was necessary to be exposed for long periods of time. At certain situations this time amounted to days of exposure.
Eventually a lens was inserted where the pinhole was at; this corrected the dilemma of their customers wanting a sharper image. So it is not surprising that it was also at this time that the use of the pinhole itself appeared to becoming obsolete. It began to be overlooked, and seems to have gone the way of nothing more then an educational tool for classroom use.
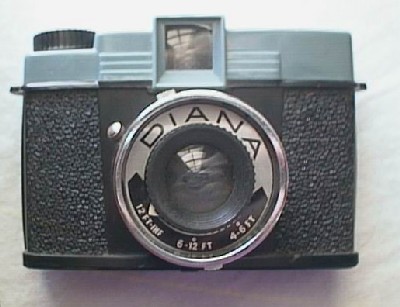
With the use of the pinhole camera becoming outdated, it was almost forgotten until the 1960's. There began a resurgence of it, and other alternative photographic methods in general. For instance when the 'Diana' camera and her various look alike cousins, were mass marketed to children as a toy. It fell into favor with artists, because of the soft dreamy quality of its unique images. And eventually a cult like following emerged that still exists today.
|
Today pinhole photography is experiencing a rebirth and allowing artists to have a more 'hands on' approach to creating photographic images. If this all appeals to you, then read on for a basic description of how to go about creating your own camera. Then put that creative masterpiece to work and see what you have been missing!
Points to Ponder Before You Begin
Even though the sensitivity of the emulsion layer has increased over time, we can still use this aspect to our advantage in pinhole photography. A very small hole is desirable in pinhole photography, but in order to have enough light to create an image, a long exposure is necessary. Think 5 seconds, hours and even days for exposure times, depending on available light. But by doing so, this will enable you to create an interesting sense of movement, with little effort.
|
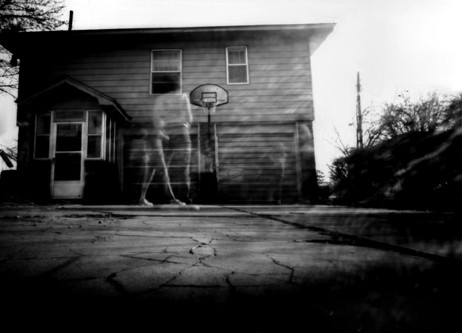
| Pinhole "Children Playing Basketball"; D. D. Barton |
Note* this image was created as the children played basketball in the yard. The total exposure time was approx 3 minutes. You can see the ghost like images of the children that stopped moving long enough for the light sensitive material to capture them.
When viewing a pinhole photo, you will notice that there is an unlimited depth of field; this is what makes an object that is close to the camera as much in focus as objects further away. Where as in the photo below the legs of the grill on the left are in as much focus as the legs of the artist, and the flower pot to the right.
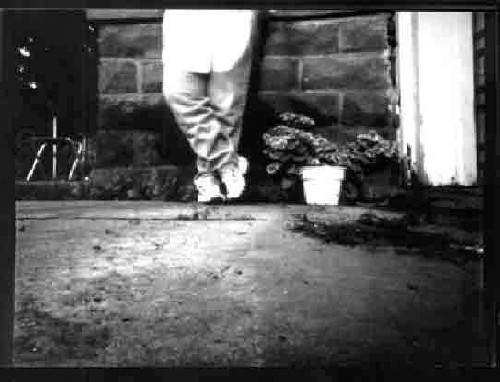
|
| Pinhole "Self Portrait of Artist"; D. D. Barton |
Creating Your Own Pinhole Camera
Note* we are assuming you will be using photo paper for your negative. If you use photo paper, you will need a darkroom to develop it. But please keep in mind that is possible to create a pinhole camera from an existing camera and using film for negatives, thereby eliminating the need for a darkroom. Think of a camera lens cap built from aluminum with a pinhole created in the center. If you use film you can send the roll off to be developed as you would any other roll of film.
If you wish to use a darkroom yourself, check with your local school district, as many are unloading their traditional darkroom equipment for digital. And of course there is always good old E-bay, and other venues for obtaining used equipment. Look for a basic enlarger, developing trays, safe light and chemicals. Also many large art schools and universities offer open darkroom time to the public, for a fee.
If you wish to create your own pinhole camera, you can go as simple or as complex as you wish. But for a beginner with little or no experience with alternative photographic methods, I would suggest keeping things simple at first. You can always expand the process to fit your own personal artistic needs later once you know you understand the concept behind the process.
To begin with you will need to start with a light tight box of some sort. This can be also the most difficult supply for you to find. Certain boxes tend to work better then others. For instance shoe boxes are the worst. Although they have a lid, one would think this would make loading easier, but it also is almost impossible to make light tight. Instead think smaller, preferably one with a focal length (length from pinhole to light sensitive material) of no more then 10 inches. The focal length will play a major roll in the amount of distortion your final image will have. The shorter the focal length the more distortion your image edges will have.
In the past it was the norm to begin pinhole photography in the classroom with a Quaker Oatmeal container. But they have since changed their lid from cardboard to plastic. The plastic lid can be difficult to make light safe and as a whole is not as easy to use as it once was. Besides! We are artist and can be a bit more creative then that!
- 1. If necessary, build the box from scrap cardboard. This will also give you control over the size of the finished box.
- 2. Use black electrical tape to cover all possible light leaks. It also makes a easy to use cover for the pinhole itself. Simply use a small piece placed over the hole.
- 3. Heavy aluminum foil or piece of a discarded aluminum can
- 4. A bead needle (found at most sewing stores) to puncture the aluminum and create the pinhole. When creating the hole think of it as being incredibly small and only visible to the human eye when held up to back lighting. This one of the most, if not THE most important part of the camera. And there are books/articles written on JUST making the pinhole itself correctly. But for now lets keep it simple, to get things rolling.
- 5. Black paint. Spray paint works well. Just be sure to use it outside in good ventilation. Paint the entire interior of the camera, including the lid. But be careful to not plug the pinhole. Check to make sure it is clear before you load it with the light sensitive material.
- 6. A stop watch or other method of keeping track of exposure and/or developing that has a second hand.
Once you have created a beginning camera and are ready to take it all farther, the only thing that will hold you back is your own creativity. In the past pinhole cameras have been made from anything from cars, refrigerator boxes, rooms and even the human mouth and hand. Anything that can hold light sensitive material and can control the amount of light that is omitted can be used.
Keeping all this in mind you should have no problem creating a camera that will create unique artistic images that will be enjoyed not only for the image itself but the process that was used to produce them.
References For More Information
Books
D. D. Barton, A Beginners Guide to Basic Pinhole Photography: How to build and Use a Variable Focal Length Pinhole Camera, Hawkeye Publishing, (2001). Basic information and plans on building various pinhole cameras, including one that includes a unique 'Variable Focal Length' camera
Christopher James, The Book of Alternative Photographic Processes, Delmar Learning; (June 21, 2001) Is a great source for alternative photography information
Eric Renner, Pinhole Photography: Rediscovering a Historic Technique, Focal Press; 2nd edition (October 1999). Considered the 'Bible' of Pinhole Photography
Philip Steadman, Vermeer's Camera: Uncovering the Truth behind the Masterpieces, Oxford University Press, 2002.
Internet
http://www.pinhole.com - Contains a directory of resources, discussion area, galleries of pinhole photographs, and more
http://www.pinholeresource.com - Contains more information then you even knew you needed.
http://www.mrpinhole.com/ - Contains incredible color pinhole images.
http://www.luminous-landscape.com/tutorials/pinhole.shtml - Contains examples of cameras and information on pinhole photography in general.


