- Home
- Education
- Glass Stone Clay
- Live Studio Fused Glass
Live Studio- Fused Glass
Lisa Allen
Glass, Stone, Clay
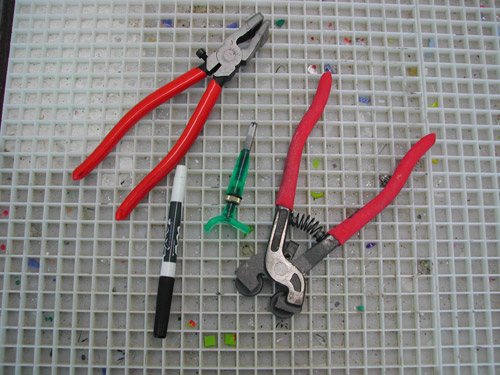
Tonight I am going to take you through the process of making 2 fused glass trays, with pattern bar design elements on top. First, we need to get the right tools for the project. You will need some fusible glass, a glass cutter for scoring the glass, a pair of running pliers to run the score and break the glass, an erasable marker to mark you glass before cutting, a ruler, a ceramic mold to give your piece its final shape, and a kiln of course.
Pattern bars are the first thing to make for the project. The bars are
going to be 16ââ¬Â long and 1.5ââ¬Â high and wide. After firing it to fuse it
together, they will be sliced like a loaf of bread using a wet tile saw
and the slices used on top of the trays. So the first thing to do is
decide what kind of pattern you want and mark you glass to get the right
width strips. Not just any glass will work in the kiln. It has to be
glass that was made specifically for fusing and each glass has to be
compatible with the other glasses or you will get stress cracking in the
end piece. I use exclusively Bullseye glass because they have a great
range of fusible colors that are compatible with eachother.
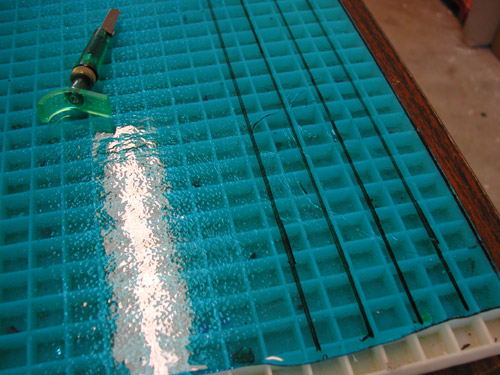
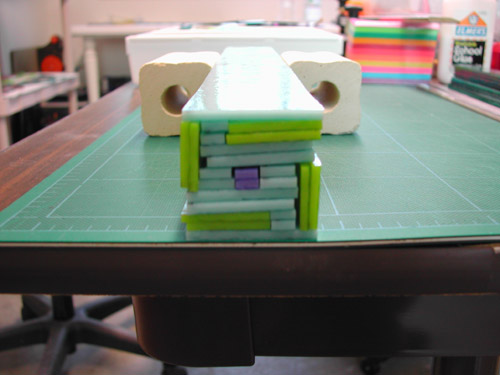
The pattern bar is made by cutting 16ââ¬Â long strips of glass and stacking them 12 layers high. Each layer has different colors and different widths of strips. How you cut each strip in each layer determines the pattern you will end up with.

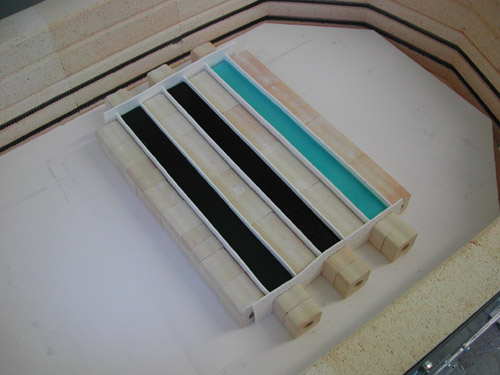
So, now you have cut all of your strips and you are ready to layer them in the pattern you have decided to make. It can be a little precarious to stack them in the kiln, so I always do it on my worktable first using supports on either side to keep it from toppling.
Once in the kiln, the bars are supported all the way around by kiln posts to keep them confined in the shape I want, otherwise they would spread and flow trying to get to 1/4ââ¬Â which is the level that glass seeks. I also use 1/8th inch fiber paper in between the glass and the posts to keep the glass from getting stuck to the posts. The paper is refractory material and resists heat up to 2300 degrees and is a great separator for the glass.
The firing schedule for the bars is 300 dph
(degrees per hour) to 1000ú hold 10 minutes, 900dph to 1475ú hold 30
minutes, afap ( as fast as possible) to 960ú hold 3 hours, 60dph to 750ú
no hold, then let the kiln cool by itself to room temp. All glasses
have an annealing range that allows it to slowly relieve its stress
while it is coming back to a solid state. This is a crucial step that
can either leave you with a stressed, fragile piece or a sturdy, solid
piece. The annealing range for Bullseye glass is between 990ú and 750ú
and the glass must be taken through this range slowly enough to let it
come back to a solid successfully. Typically for Bullseye glass, a hold
at 960ú is used to get the glass temp regulated followed by a slow
descent to 750ú or 700ú. Opal glass annealing point is 935ú and
transparent glass is 990ú, so 960ú is the average temp chosen to
accommodate a piece with both glasses.
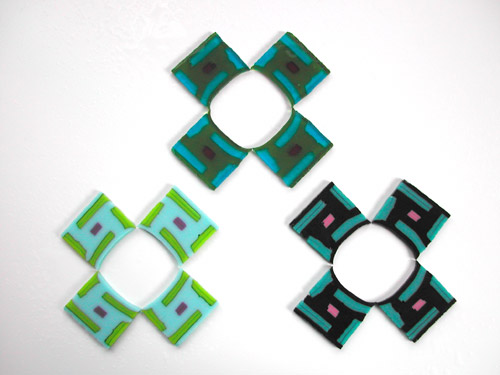
A successful firing! Now it is off to the tile saw to slice up the
bars. Think of the bars as a loaf of bread that is getting sliced up to
give many little cross sections of the pattern set up. The following
image is of 4 slices of each of the 3 bars made and seen in the kiln. I
have arranged them in the pattern that will be used in the final
pieces.
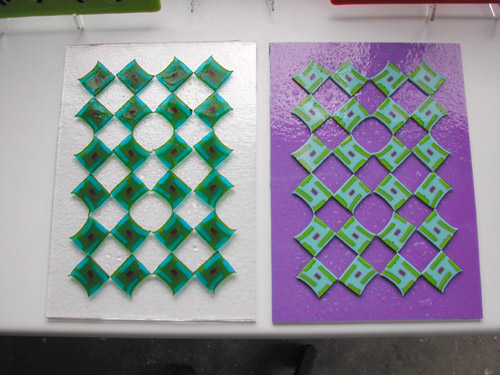
Each slice has to now be cleaned really well before being added to a design. If any saw scum is left on the slices, it shows up as a hazy, dirty area on the final piece. After cleaning, the slices are arranged into a design on the cut pieces of glass that will make up the trays. The trays we are making are going to be 2 layer, 10ââ¬Â x 16ââ¬Â rectangles with slices on top. I use 2 layers of 1/8ââ¬Â glass to make the base for heft and because the glass will seek 1/4ââ¬Â, so if it is only 1 layer it will draw up on the sides and not give a clean line. Here is a pic of 2 pieces we're making, using the pattern bars that are cleaned, layed out and ready to be put in the kiln.
The pieces are now put into the kiln for a full
fuse firing. The schedule for this firing is 300dph to 1100ú no hold,
50dph to 1250ú no hold, 400dph to 1450ú hold 20 minutes, afap to 960ú
hold 3 hours, 60dph to 750ú no hold, cool to room temp naturally (no
peeking). The slow down in the middle of the schedule is to reduce the
bubbles that can form between layers if the edges of the glass seal
before the air can escape. Also, glass can be easily thermally shocked
if the kiln is opened and the glass is cooled too rapidly. So, no
checking until the temp reads 200 or below.

Another successful firing! Now the glass is taken
out and cleaned up a bit. It is off to the sandblaster to blast off
the top surface of the piece before the final firing which is the slump
firing. This is the firing that gives the tray its shape depending on
the mold you choose to use. Molds are generally ceramic and have to be
painted with kiln wash to act as a separator so that the glass will not
stick to them. The blasting is done because I want the piece to have a
satin finish rather than the high gloss, shiny finish and this can only
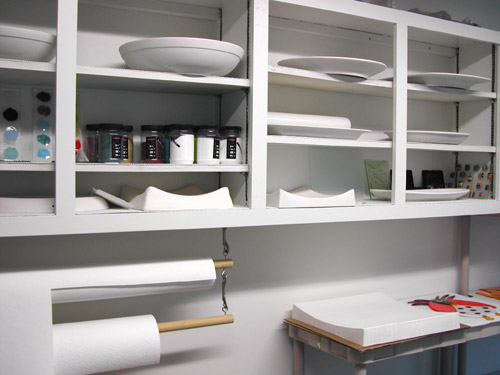
be accomplished with a blasted surface. Here is a picture showing
various ceramic slumping molds.
Now the blasted pieces go back into the kiln one at a time for their final slump firing. The chosen mold has been kiln washed and is set up on kiln posts to raise it up off the kiln shelf. This is to allow air to circulate under it for more even heating, The first piece is placed on the mold, making sure it is level. I am not sure if the picture will show it clearly, but the piece now has a frosted look from the sand blasting.
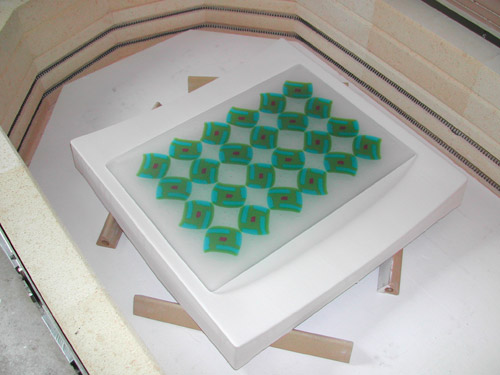
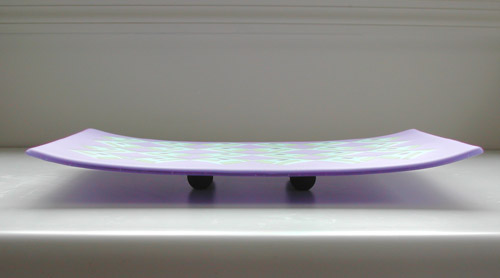
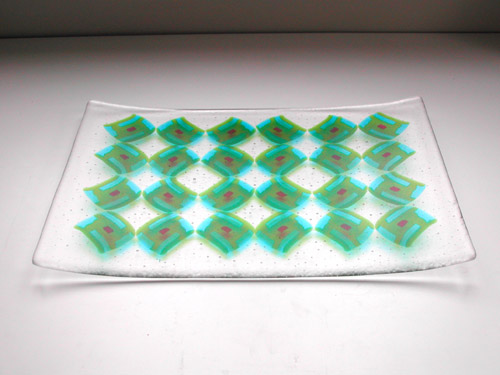
This final firing will also give me the satin finish I want, as it is accomplished in the same temp range as the slump. The firing schedule for this firing is 250 dph to 1170ú hold 20 minutes, afap to 960ú hold 3 hours, 60dph to 750ú no hold, cool to room temp. Then voilaââ¬Â¦the final trays emerge from their respective firings. Some glass marbles are added as feet and they are ready to go. The marbles for the transparent piece have not arrived yet, so here it is without its feet.
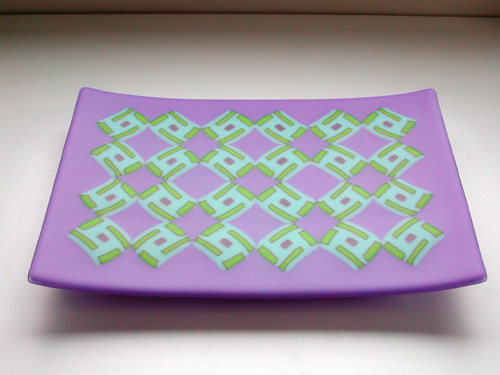
Here is the opaque piece with its feet, but from a top view.
And finally, a view of the opaque piece from the side, showing the feet.